Friday, October 30, 2015

Busy fall days acting like a homesteader

October has been a busy month.  I'm into canning and a lot of other homestead lifestyle activities even though I still live on the small trailer lot in the middle of town. 

But notice the mesh bag hanging on the deck.  That's sheep's wool hanging out to dry. It was tedious work cleaning it, and there are many more bags worth yet to do, but when I am done washing and carding it, I will have enough bats to make a warm quilt.  This is a project I started because I am still hoping to get that piece of land and then we are planning on having sheep.  The wool was given to me and I wanted to get started learning to use it.


My cottage garden around the trailer has to fend for itself a lot these days, but it seems to be doing well in spite of my being so sidetracked.


We have already had a few light frosts, and even though the roses have been hit, it doesn't prevent them from putting on a show.


While some of the less hardy annuals, like impatiens, have succumbed to the cold, there are plenty of perennials and a few brave annuals like alyssum and lobelia to carry on until the snow covers them.


In my front walk garden, the birds planted a sunflower seed, and it adds a needed bit of color to that side of the house.

So while the garden continues on with it's mums, and munk's hood, and roses,


I'll just keep playing acting being a homesteader, and I'll put up some more jars of tomatoes to help see me through the winter.


Easy Craft - Autumn Votive Jar


As I promised in my last post, here are the easy little handmade votive cups I promised to show you. These were a hit at my last gathering of friends. I made two different kinds; one using the leftover corn kernels from my Indian Corn wreath and one using the corn husks from that same project.


For this craft you will need the following supplies

*Various sizes of glass canning jars – I found mine at Wal-Mart but Kroger and Dollar General Market have them too.

*Indian Corn Kernels (see video in this post)

*Corn Husks from Indian corn (corn shucks for you southern folks)

*Battery powered votives – real ones could defiantly be a fire hazard

*Paper Raffia I got mine from Nashvillewraps.com

*Hot glue for the corn shuck ones


Corn Kernel Votive Jar
Choose the jar you like and fill it two-thirds full of corn kernels.  You could use cabdy corn for this too. For both projects I tore one left over corn husk into narrow strips and glued a strip around my battery votives - looks so cute!. Tie a little raffia knot around the jar top and you are done! I used Orange and Kraft colored Raffia but any colors you like will be pretty.


Corn Husk Votive Jars

For this project, I curled the pretty corn husks around the inside of my glass canning jars. I stuffed more husks inside this curled layer to make a place for my battery powered votive to rest.  As above, use your Raffia to tie a knot or bow arond the jar. These would be cute on your Thanksgiving table too.


I’d love to see pictures of your votives. Send them to Kathy Green and I will post them and give you credit in a future blog post.

Carol’s Garden of the Month (November)

Carols garden guide for the Oxford College of Garden Design

_MG_3416-EditI first visited Denmans  the garden of the venerated John Brookes many years ago on a hot sunny day in July and was so very excited to be there after eagerly devouring every book he had written and attempting to create my own garden around his design principles.

It did not disappoint although sadly on reflection mine was an insult to design and the great man himself!!!!

I have been there several times since as I am now privileged to know John, most recently just last week and it was such a different experience seeing it in late autumn.

At this time of year it is easy to see that It is clearly designed around exactly the same philosophy as is now taught at the Oxford College of Garden Design!

The strong use of ground pattern creates an underlying framework that holds the design together creating a strong and impelling route of flow – similar to my own garden! At last I have a garden that has got it right although I personally take little credit for that!

Denmans is admittedly 30+ years old and by John’s own admission some of the planting needs updating and plans are afoot to start again in the walled garden area which is exciting!

Nevertheless there is still plenty to enjoy in the plant department with loads of texture and colour as the photos prove! However right now it is a fantastic garden to visit to see the bare bones of a great design but if you are a “plant-a-holic” wait until June or go twice!

The garden is open all year and there is a really nice little garden centre attached to it that sells everything from a primrose to a £3000 full sized sculpture of a vestal virgin (well virgin’s don’t come cheap!)

Also there is a great restaurant with loads of quirky stuff in it (no not the food which is lovely) .

Go and pay homage!!!

Map picture

Saving Seeds

I grew many heirloom plants this year and I wanted to save the seeds of the ones I liked best. Several friends gave me heirloom veggies that I wanted to grow in my garden next year so I had to save those seeds for sure.

I have nosy squirrels and feed lots of birds so drying outside is not an option for me. I wanted to save seeds from my tomatoes, peppers and three varieties of Basil. The peppers were easy. A sheet of waxed paper, scrape out seeds of the best mature peppers and they were dry inside on my utility room counter in a day. I used the small enclosure card envelopes that you see above for all my seeds. (I buy mine from Nashville Wraps) Label them with variety and date. I store mine in a drawer in the studio until time to plant. I have sometimes stored seeds in airtight bags in the freezer. This works well if you have more than you need for one year and want to save longer.

Tomatoes are the worst but not hard. I use my tea strainer to rinse these seeds. I rinse and rub them around on the strainer until most of the slimy covering is gone. Then I spread them out on parchment paper to dry. After 24 hours I loosen them from the parchment paper but leave them to completely dry before I store them. I treat squash and pumpkin pretty much the same way.


Basil is easy, wait until the blooms form hard spikes. Cut them off and place in a paper bag to dry completely. Shake out the tiny black seeds and put them in envelopes. The seeds on the plants in this picture are about ready to harvest. My Tai Basil makes little rosettes instead of spikes but when they are dry, I put them in bags to cure like all the rest. Be sure to label your envelopes & drying bags – all basil seeds look alike!


Annual flowers work pretty much the same. Be sure your plants are not hybrid – these will sometimes not germinate or if they do they will revert back to the original wild stock. Marigolds, zinnia, cone flowers, cosmos and angel trumpets are easy to grow from seeds saved.

Why would anyone want to pay $2.00 and up for a tiny amount of seeds when you can save your own for free? Find a friend or two to trade seeds with and everyone is a winner!

Thursday, October 29, 2015

Choosing the right pruners.


Choosing the right pruners. Your hand size and grip strength and the type of pruning you’ll be doing are important factors in choosing a pruner. Pruners can be broken down into two basic categories: anvil and bypass.
 
Anvil pruners have a fixed flat blade (anvil) and one moving blade that pins the branch in place and then cuts it. It’s much like using a knife on a chopping board. Anvil pruners tend to crush the branch rather that cut it. Anvil pruners are very useful in cutting dead branches.


Bypass pruners cut like a pair of scissors. One sharp blade cuts the branch as it moves by a thicker, unsharpened blade. Using a bypass pruner will result in a cleaner cut and less damage to the branch you’re working on. Hand pruners will cut stems and branches up to 1". For branches that are 1"-2", choose a lopper.
 
Unlock the pruner and hold it in your hand. It should fit comfortably. Try it out. Ask to cut something with it. The bottom line is pick a pruner that feels comfortable in your hand, that you can use for a long time and one that makes easy cuts.

You’ll be pleased with the results of having spent the time to find just the right pruner for you.
Felco has been making their classic model #2 for decades, but the #6 may be a better fit if you have small hands. Check the chart.
 For light trimming and deadheading, consider a pair of Garden Cut Pruning Shears. These shears stay sharp over many cuttings. Bonsai shears offer another choice for trimming and shaping. This one is nice because it has a finger loop to increase accuracy and reduce fatigue. Pruning, trimming and deadheading roses and shrubs is a key part of gardening. Having the right tools makers pruning much easier. Disinfect pruners with a Lysol or Clorox disinfectant wipe or dip your pruners in disinfectant solution to reduce risk of spreading disease among roses or bushes. Once you are doing pruning and disinfecting, spray blades with a silicone lubricant, to keep your pruners in top working shape.


Wednesday, October 28, 2015

Fall Rose Care Tips


As we head into November, here are some tips for caring for your roses. Keep watering, stop fertilizing and stop deadheading. Deadheading is the act of snipping off the rose bloom as it begins to fade.
We do this so the rose is encouraged to bloom again. As the rose begins to fade and petals fall, the seed pod, called a hip begins to form.
Like any other plant, roses flower in order to reproduce. We want them to bloom again, so we prune the flowers off. When we leave the hips alone, the rose stops flowering. It’s another clue to the plant to slow down and go dormant, which is what we want to happen, this time of year. After our first hard frost, prune the canes down to about 24" to 30".
In late November, after the ground is frozen, apply rose collars around the base of the rose and fill with Soil Pep.
The idea is to keep the ground cold and stable. We can get some warm winter days, warm enough to thaw the soil around the rose. As the temperature cools at night, the ground freezes again. This thaw/freeze cycle can damage the rose to the point it doesn’t come back in the spring.  
Mulching will help keep the ground stable and protect the rose. Water your dormant roses every 4-5 weeks during the winter. If you have questions about pruning and mulching roses, stop in and see us. We’ll be glad to answer your questions and show you how to take care of your roses this winter.

New Book by Luciano Giubbilei: Nature and Human Intervention

25-10-2011 08-20-02

Nature and Human Intervention is Luciano Giubbilei’s second book. The book details the process behind the 2011 Laurent-Perrier Chelsea Flower Show gold-medal garden,a collaboration between three acclaimed artists-garden designer Luciano Giubbilei, architect Kengo Kuma,and sculptor Peter Randall-Page.

Captured in 250 colour photographs by Steve Wooster and Allan Pollock-Morris and essays by garden historian Kathryn Aalto,the book shows how artists, craftsmen, and suppliers worked together to expose, highlight, and craft beauty from Nature. “We return time and again to the comfortable vocabularies, images, sounds, memories, thoughts and feelings that constitute the boundaries of our experience and expression,”says Luciano  Giubbilei.“Yet every now and then, we encounter a breakthrough moment– a rare instant when the daunting constraints of possibility melt away and when we gain the courage to focus through new lenses.

”The book is published as a limited edition of 1000 numbered copies, of which only 500 copies are to be released to the general public. Retailing at £35.00 to purchase a copy please visit www.lucianogiubbilei.com.

Tuesday, October 27, 2015

Nature and Human Intervention

By garden designer Luciano Giubbilei.

Leading British sculptor Peter Randell-Page and Japanese architect Kengo Kuma contributed to the garden with a sensory bamboo pavilion and three commissioned sculptures.

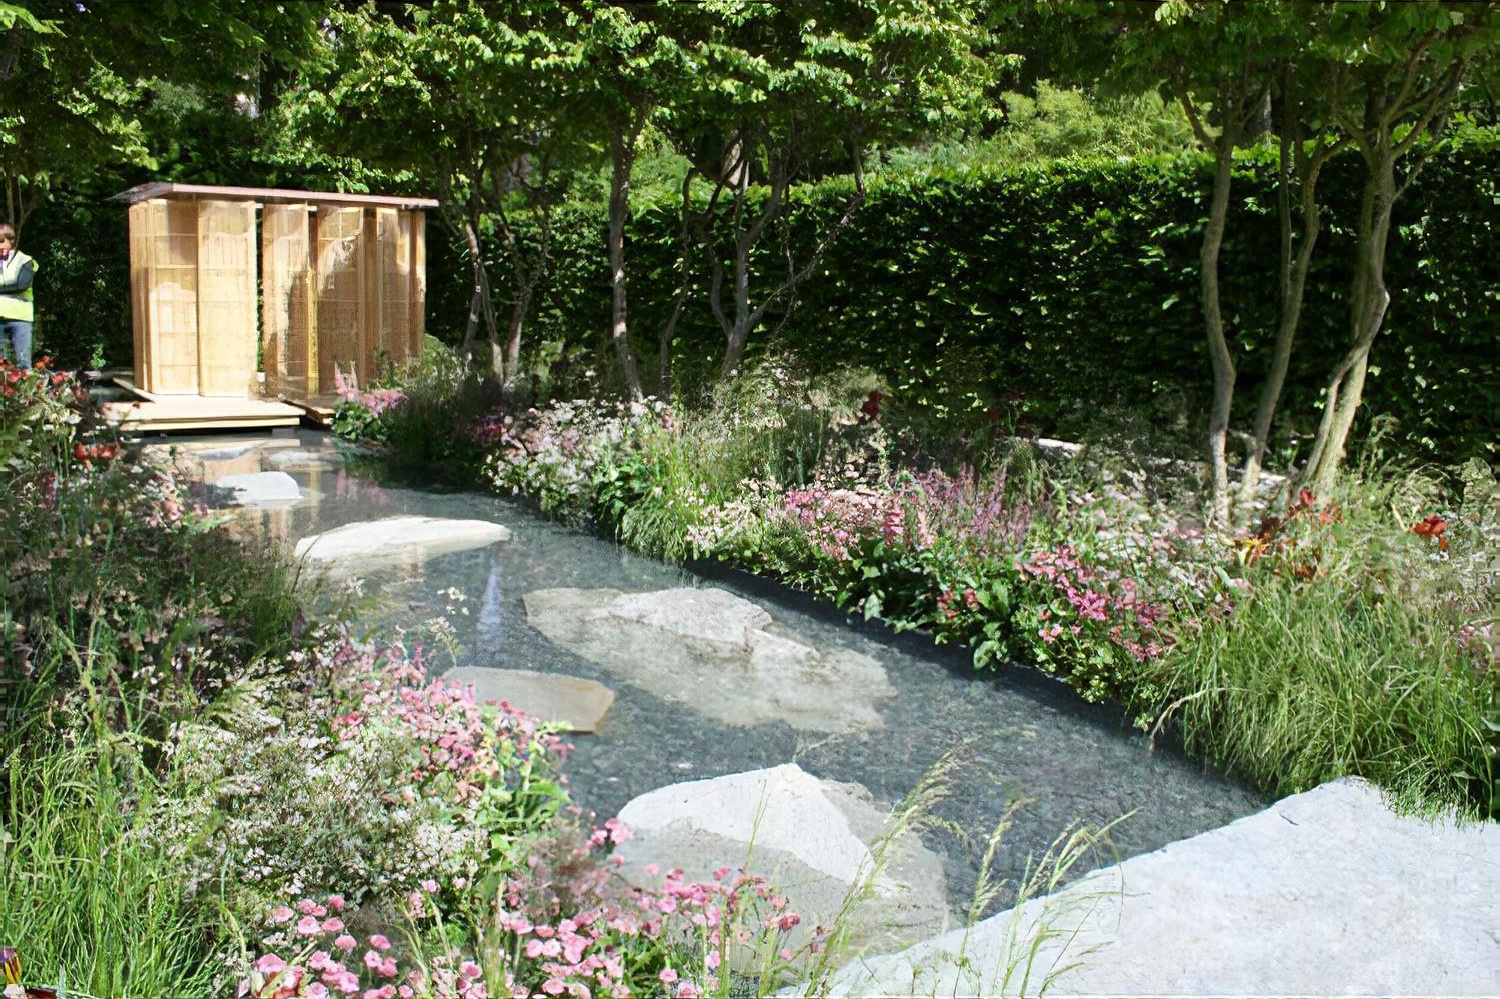
The Laurent Perrier Garden Nature and Human Intervention by garden designer Luciano Giubbilei Chelsea Flower Show 2011

Divided into two distinct areas, one space evoked a calming and meditative mood, whilst contrasting with a more vibrant densely planted space. It was designed to create a romantic atmosphere, with colours varying between browns, bronze and soft pink, reflective of Laurent Perrier Cuvée Rosé champagne.

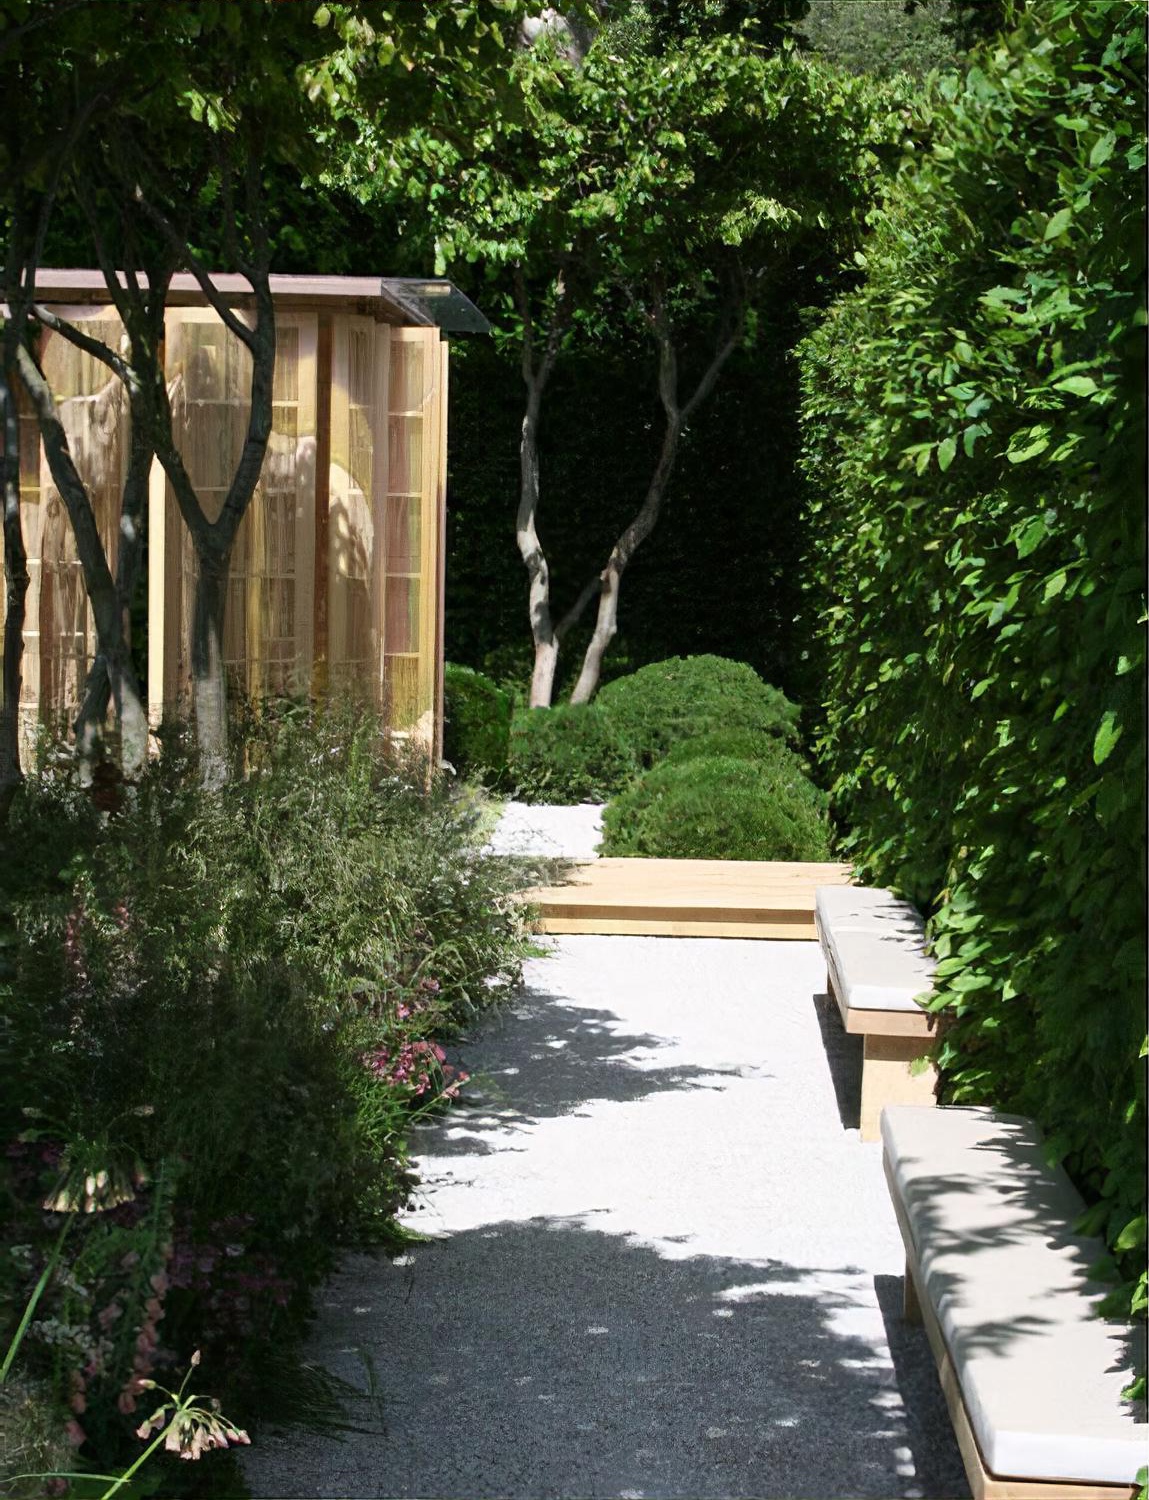
The Laurent Perrier Garden Nature and Human Intervention by garden designer Luciano Giubbilei Chelsea Flower Show 2011

Exploring the theme of “nature and human intervention”, the intention was to bring together both garden, art and architecture in a composition that reveals, complements and enhances a shared philosophy. The theme of the garden was conveyed by a strong design layout against a softer style of  planting. At one end was the pavilion, at the other is a densely planted, romantic and elegant space that frames the water and is designed to be walked through.

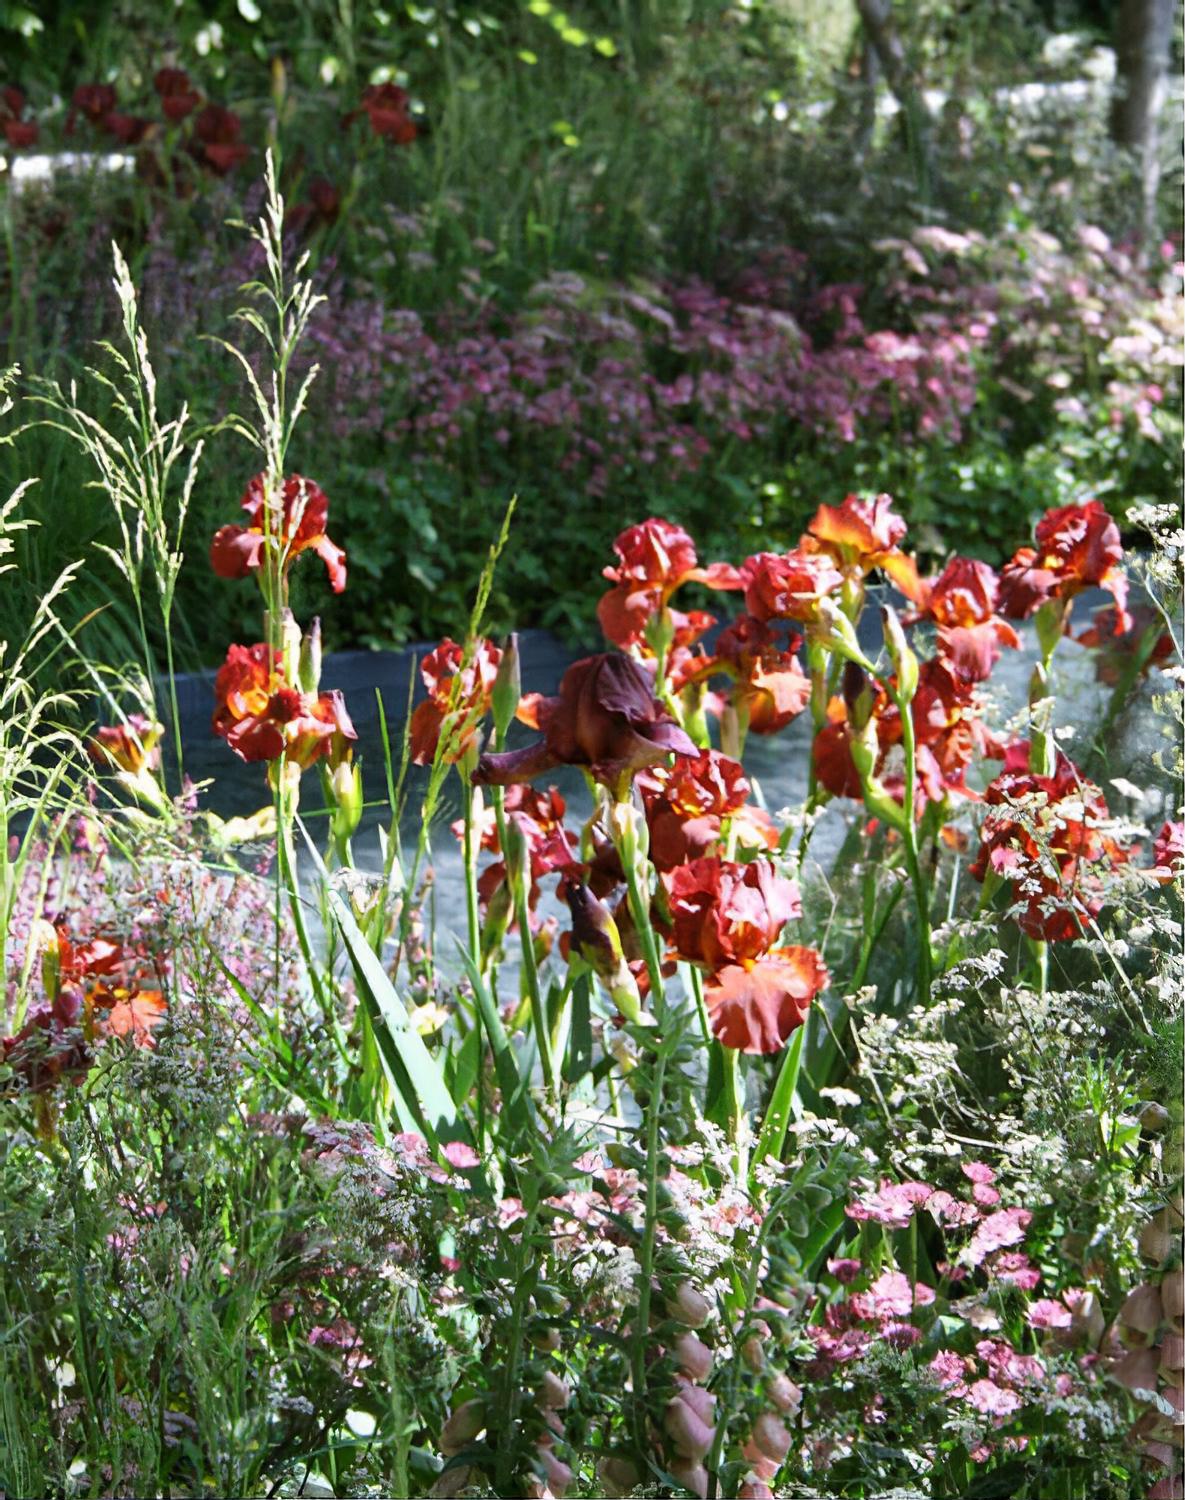
The Laurent Perrier Garden Nature and Human Intervention by garden designer Luciano Giubbilei Chelsea Flower Show 2011

The main structural planting consists of Parrotia persica, positioned to interact with each of the other elements in the garden. Parrotia persica’s twisted clear stems show both how nature creates beauty and the skill of the modern nurseryman in exposing it.

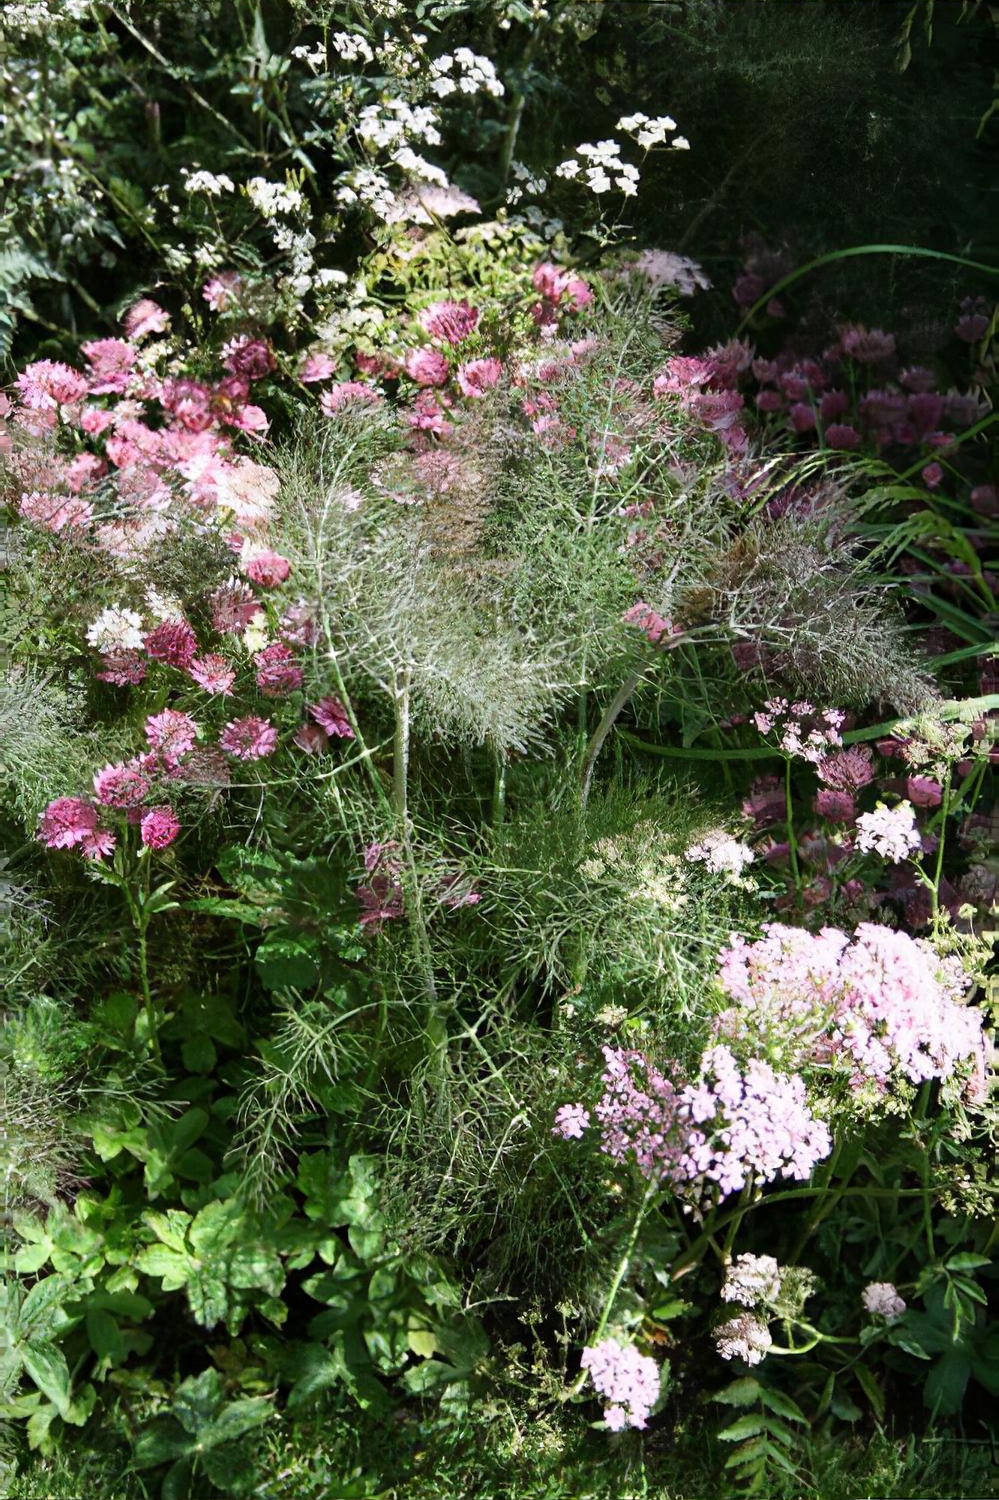
The Laurent Perrier Garden Nature and Human Intervention by garden designer Luciano Giubbilei Chelsea Flower Show 2011

The trees will provide interest throughout the year, with autumnal colour, the structural form and flowers in the winter, and glossy green foliage for the spring and summer. The Pinus mugo at the rear of the garden are planted on a backdrop of gravel, silhouetting the clipped cloud like form. Being an evergreen they will also provide winter interest.

The Laurent Perrier Garden Nature and Human Intervention by garden designer Luciano Giubbilei Chelsea Flower Show 2011

The composition of the flower scheme is designed to create a romantic atmosphere. The plants were selected for their colour combination, which predominately varies between browns, bronze and soft pinks.


Plants list  

Trees
Parrotia persica
Hedges
Carpinus betulus
Flowers (Perennials - Victorian Pink)
Chaerophyllum hirsutum Roseum
Pimpinella major Rosea
Aconitum Pink Sensation
Astrantia Roma
Astrantia maxima
Astrantia Buckland
Digitalis × mertonensis
Papaver Patty's Plum
Papaver Royal Chocolate Distinction
Papaver Harlem
Papaver Manhattan
Nectaroscordum siculum
Salvia pratensis Lapis Lazuli
Salvia nemorosa Rose Queen
Salvia nemorosa Amethyst
Geranium phaeum
Iris germanica Quechee
Iris germanica Carnival Time
Iris germanica Sultan's Palace
Iris germanica Dutch Chocolate
Iris germanica Fortunate Son
Iris germanica Louvoir
Iris germanica Cable Car
Sanguisorba menziesii
Thalictrum aquilegifolium Thundercloud
Thalictrum aquilegifolium
Thalictrum Ellin
Thalictrum Black Stockings
Verbascum (Cotswold Group) Pink Domino
Verbascum Merlin
Verbascum Cherry Helen
Pinus mugo mops - Green cushion plants
Sanguisorba minor
Bupleurum longifolium sub. Aureum
Salvia pratensis Twilight
Papaver Lauren's Lilac
Verbascum Petra
Verbascum Valerie Grace
Verbascum Apricot Sunset
Salvia pratensis Rose Rhapsody
Panicum virgatum Rehbraun
Anthriscus sylvestris Ravenswing
Deschampsia cespitosa


Monday, October 26, 2015

Raised Herb Beds Update

The first season for my raised beds of herbs is almost done. The oak leaves are falling and will soon cover the beds with a warm blanket for winter protection.I wanted to give you an update on how the plants did and what I've learned.

I wanted these beds to be as maintenance free as possible. I only watered them once or twice all summer and we had some severe heat and dry weeks. I think the compost helped keep moisture in the beds. I also did not add any additional fertilizer - again the compost was all the plants needed. Herbs don't need much fertilizer anyway and they like dry and well drained.

Oregano growing under Lavender
The Oregano is the happiest plant in the gardens. It has almost covered the bed where I planted it under Spanish and Goodwin Creek Lavenders. I have dried lots of oregano and will use it in the gift baskets that I make for family and friends at Christmas. I'll post the pretty packaging I make when it is done, Maybe give you a printable label you can use yourself.


Coleus Suprise
I was happy with my little sage plant's progress too and I had this little surprise come up in one of my beds. I'm sure the seeds for this coleus were in my compost.
Sage
 
Some of the lavender plants have done well and some not. the Provence all died. Goodwin Creek is happy and Serenity too. The Spanish lavender is very healthy and full but I will be pleasantly surprised if it survives our winter temps.
Goodwin Creek

Spanish lavender growing around Goodwin Creek
 
The Thymes are holding their own. Honestly, the thyme I planted in large pots seem to do better than ones I planted in the ground. Elven and Wooly thyme are growing well but they are more ornamantal than culinary. I do like them in my rock gardens and they have added interest to my raised beds. I planted Purple Sage late in the season and it is doing well considering the short time it has been in the ground. It should make quite a show next year. To see how I started these beds see my post titled Raised Herb Beds Part 1  and Raised Beds Part 2. Are you growing any thing in raised beds? Post a comment and tell us about it.  


Sunday, October 25, 2015

Tips for Growing Winter Veggies

Most of you know that I have no sunny spot to grow veggies period much less winter ones but I know lots of you do. I found this really good post today and wanted to share it with you. I think maybe my son Zack (he inherited the green thumb) and I may attempt a vegetable garden in my lower back yard next spring. In the mean time, please enjoy this post from DIY Natural
http://www.diynatural.com/winter-vegetables/?awt_l=5qXWw&awt_m=3kdFQ7zQMItFQkt

Friday, October 23, 2015

Congratulations

I’ve now finished marking the final portfolio submissions from the OCGD students of 2007/2008 who completed their last assignments during the summer and I am delighted to be able to send my heartfelt congratulations to the student who came top of the class and has graduated with a much-deserved distinction.

Emily Garbutt, who lives in Reading, gained an overall score of 80% thanks to her consistency and attention to detail throughout every assignment. I always tell my students “The Devil’s In The Detail” and Emily’s distinction is proof of this adage.

Emily, whose background is in art and photography, is already designing for private clients and, alongside design talent, brings a wealth of understanding of construction and hard landscaping to her projects thanks to working alongside her partner, Trevor, who is the founder of the Reading-based EarthTech Landscaping.

The students in this year’s new intake are just completing the site survey for their very first project and I am looking forward to writing my Blog this time next year when, hopefully, I will be introducing you to more of our graduates who have achieved the same high standard as Emily.

It’s funny but I was only asked the other day how come, when the majority of students attending garden design courses are female (this year we have just one male and ?? females) the majority of the well-known garden designers are still men?

Emily’s success proves there’s no reason for this gender discrepancy but when I stopped to think about it, I guess the answer has to be that primarily, the men who come on the course are intending to be the primary breadwinners in the family while a lot of the females will be working to bring in a secondary income.

A lot of our students, in fact the majority, are usually either mid-life or mid-something career changers and maybe, having enjoyed success in their previous careers, they’re now looking to take their foot of the gas somewhat? I’m not really sure because it’s such a personal thing.

What I do know, and I am forever banging on about this with my students, is that design talent is not enough to make a name for yourself in garden design (if that’s your goal) you also need good business acumen.

One of the first things I send students who are about to graduate is a link to one of their local business support organisations and I’ve noticed that those who follow through on this are those most likely to succeed.


I’ve also noticed that while a lot of our students who, like Emily, have an art background do extremely well on the course, so do many of the career changers who join us from a background of financial services, including banking.

Come to think of it, with the collapse of so many of the once-trusted and long-established banks, maybe we should start advertising the course in the Financial Times!

Thursday, October 22, 2015

Choosing small bulbs with big colors.


Spring flowering bulbs are a great way to add color and variety to your garden. In addition to tulips, daffodils and hyacinths, small bulbs (called minor bulbs) will add bursts of color from late winter through early spring. Minor bulbs are among the very first to bloom and they are available in a wide array of colors and styles. Here are a few of the choices for early minor bulbs.


Galanthus, known as Garden Snowdrop. Galanthus are very early to arrive, often blooming before crocus. Galanthus will do well in sun or partial shade. 

Scillia Siberica will appear soon after Galanthus, with dark blue flowers. Scillia can be planted under trees, because they bloom early, before the tree leafs out.

Puschkinia are very hardy bulbs, flowers are star shaped and striped in blue and white. Also known as striped squill, puschkinia are early blooming and fragrant.


Muscari, known as grape hyacinths, are hardy spring bloomers that produce blue or purple flowers that look like bunches of grapes, hence the common name. They will do well in sun or semi-shade and spread naturally.


Crocus are easy to grow and offer a wide variety of colors. They prefer sun and well drained soils.

Selection and planting tips. Pick the highest quality bulbs. We get our bulbs directly from Holland, from people we’ve done business with for decades. These bulbs produce larger blooms the first year and they naturalize (multiply and spread) in your garden, more readily. Pick a spot with plenty of sun and amend the soil with Sheep, peat and compost, or peat moss, then add either Bone meal or Dutch bulb food and plant about 2" deep. Scatter 10-15 bulbs per square foot, for a greater color impact. Water every 4-5 weeks during the winter. Leave foliage in place after bloom, to help the bulbs spread and bloom the following spring.