There are a lot of different ways to protect the plants that you are growing for the winter months. There are a few things that you need to understand.
1. You don’t need a greenhouse. You should be growing plants that are hardy in your growing climate, therefore they will be tough enough to make it through the winter just fine.
2. Greenhouses are for growing plants and they are completely unnecessary for you
Growing Plants from Home for Profit. Greenhouses are not for storing plants over the winter months. Read that again.
You Do Not Need a Greenhouse! There’s a big difference between a greenhouse and an over wintering hoop house. A greenhouse usually has a double layer of clear plastic with air blown between the two layers for insulation as well as heat source and built in and automated ventilation to main a constant temperature conducive to good plant growth. A greenhouse is designed to make plants actively and vigorously grow during the winter months.
An over wintering hoop house has a single layer of white plastic, no heat or ventilation at all. An over wintering hoop house is designed to stay cold inside.
3. Hardy plants must be allowed to go dormant for the winter. You cannot drag them inside and keep them warm all winter. That would the same as me keeping you awake for four months straight. Plants need to sleep during the winter, winter is their resting period.
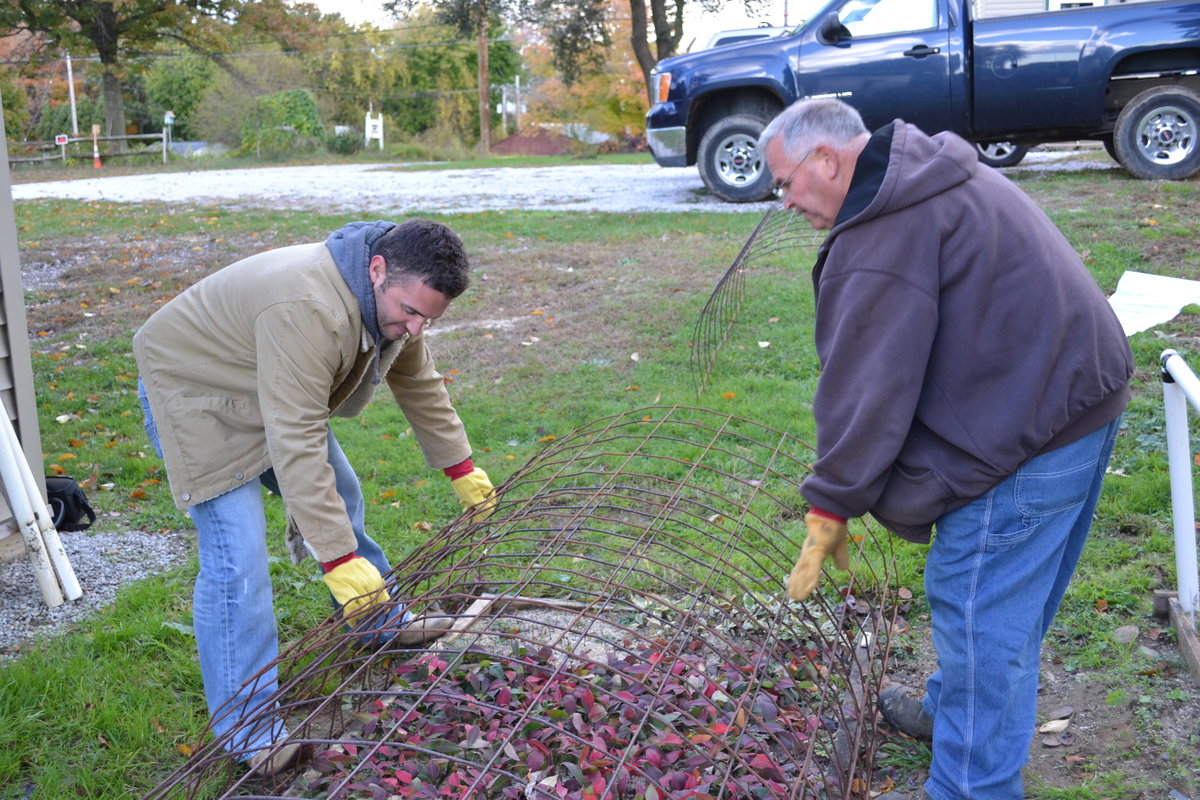
Mike and Duston McGroarty covering plants for the winter.
4. Here in the north nurseries cover plants not to keep them from freezing, they still freeze even when covered. They cover them to keep the wind off of them and to keep them moist. Plants need moisture and during the winter when you can’t be out there watering because all of your outside water is turned off for the winter, the last thing you need is the wind pounding on the potted plants sucking the moisture out of the potting soil.
White Plastic, not Clear!
5. When covering plants for the winter you have to cover them with white plastic because the white plastic reflects the rays of the sun and keeps the plants under the plastic at a uniform temperature. They might be frozen as hard as rock under the plastic, and that’s fine, they don’t mind, really they don’t. What they don’t like is to thaw out on a warm day, the freeze again that night and have that cycle repeating all winter. The constant freezing and thawing is not good for plants.
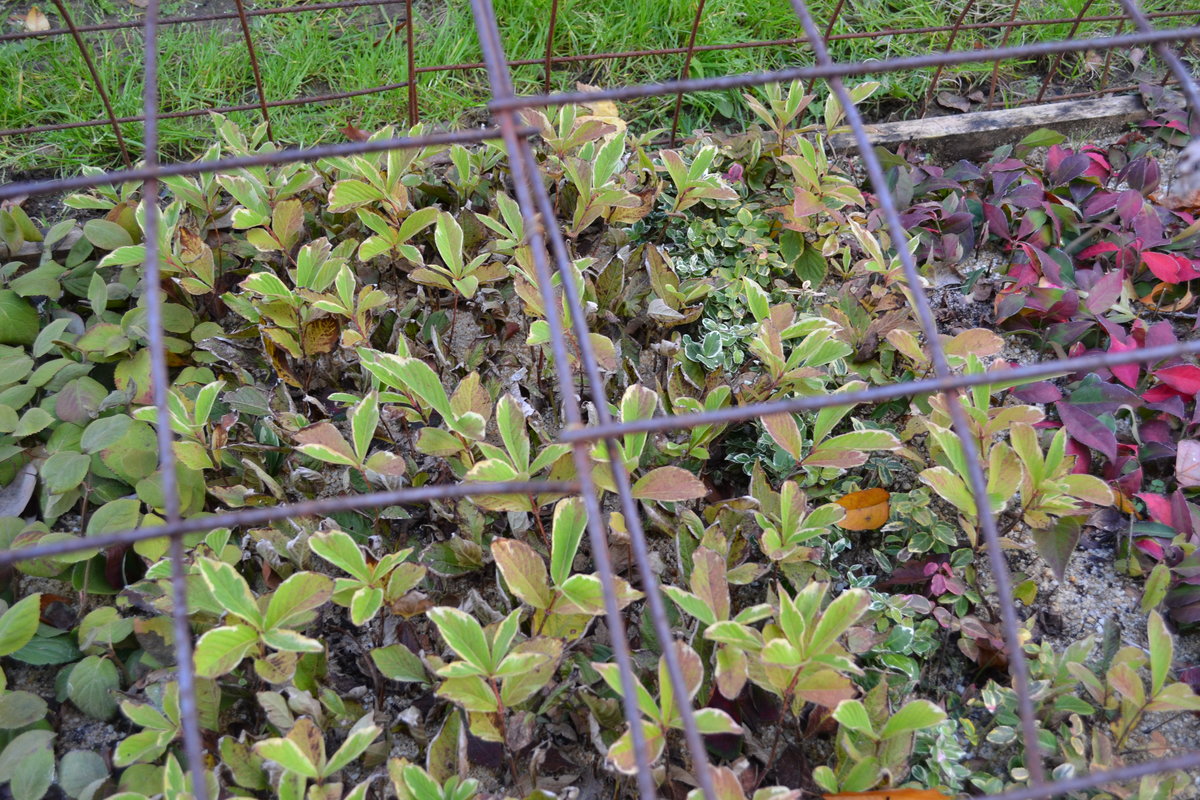
Rooted cuttings getting tucked in for the winter.
6. Clear plastic is used on a greenhouse where you want the sun to warm up the greenhouse. However, without a heating system in the greenhouse as soon as the sun goes down things can freeze. That’s why you never use clear for overwintering plants. It heats them up during the day, tricking them into thinking it’s spring, then it allows them to freeze at night, causing them serious damage.
7. White plastic is hard to find. Hardware stores and home improvement stores don’t carry it. You have to get it from a nursery supply house. Or . . . you can use clear then once the plants are covered slosh white latex paint over the clear plastic. This isn’t the perfect solution, but it does work.
Itty bitty Rooted Cuttings are Amazing Creatures and Tough as Nails.
At the top of this page I inserted a photo of Gold Drop Potentilla with a question mark. I always use Potentilla as an example of a plant that seems so frail and so tender, yet come winter they are amazingly tough, even as little tiny, spindly rooted cuttings. During the winter months I see them in propagation boxes, no leaves, skinny as skinny can be and I wonder how they can possible survive temperatures well below freezing, often down in the single digits.
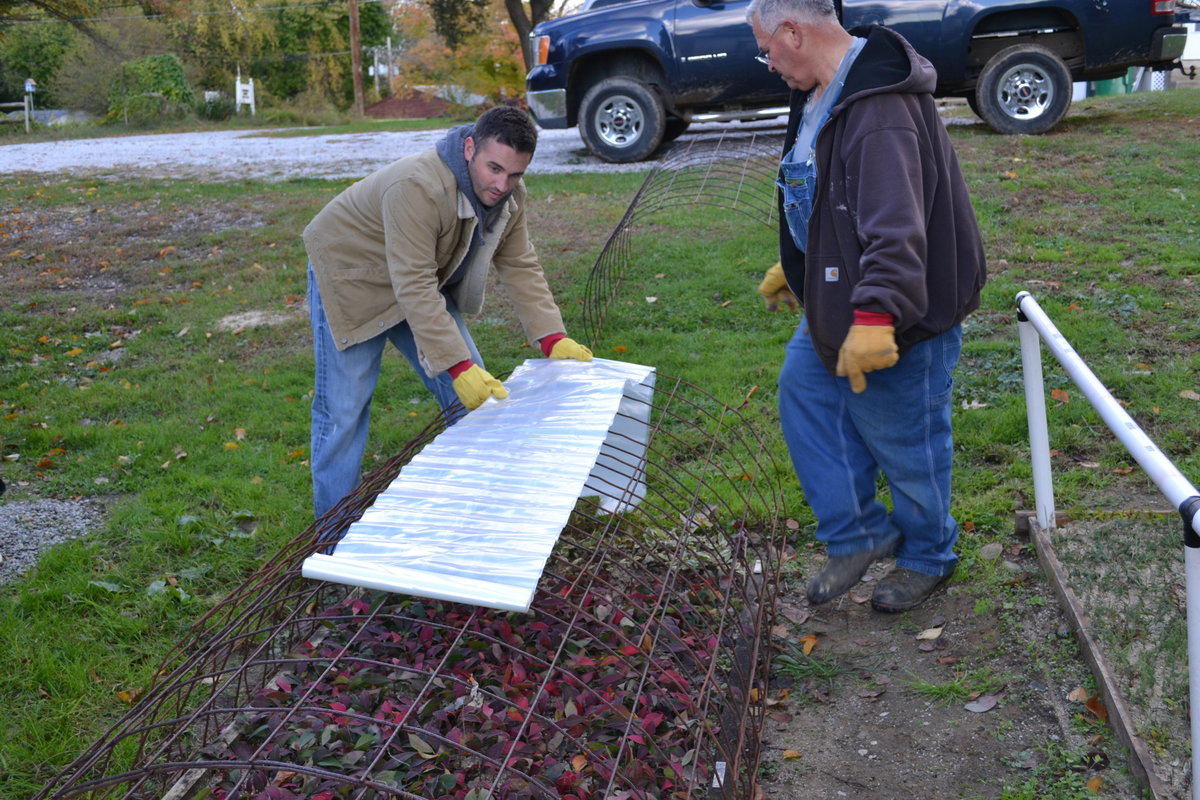
Mike & Duston McGroarty building a mini hoop house.
Step by Step Mini Hoop House House Plans Below.
Then come spring as I am walking by the propagation area I can’t help but notice them, covered with little tiny green buds just busting at the seams to open and I wonder . . . how is it possible that something so frail can be so tough. I don’t know why, all I know is that all of my rooted cuttings respond the same way. Come winter then just hunker down and wait it out. They know they have a job to do and they do it.
So what about you and I? What is our job for the winter?
Our job is to not interfere with what the plants already know how to do. They know how to survive the winter. It’s when we interfere, that’s when it all goes wrong. How do we interfere? We put plants in pots. That’s an interference. It’s not natural, it’s not normal for them. So our only job is compensate for the situation that we created with some simple steps that I am going to describe and illustrate for you here.
What about the plants in the ground? How do I protect them for the winter?
In most cases you don’t have to protect plants in the ground. Most of the time, plants in the ground are safe. It’s a natural environment for them. That’s how they are wired, to survive the winter simply by being planted in the ground where they are supposed to be.
So why are plants in pots so different?
Great question! Plants in pots are not in the ground. They are above ground. They are potted in a growing medium that is designed to drain well and drain fast. That’s perfect for the growing season, but not so great for the over wintering season. When we put plants in pots we do two things to them that is not natural. We put them in a well drained potting mix, then we set them on top of the ground and let the wind pound on the thin plastic containers. We let the sun warm them during the day dehydrating them. The only thing between their precious roots and the harsh elements is a thin piece of plastic. We prevent their roots from reaching out into the soil where they can pick up the moisture they need.
We Rob them of the Natural Warmth of the Ground!
Do Not under estimate the warmth of the earth. Think about an igloo, made of snow, yet much warmer than the outside air. Ground heat is precious to a plant grower, use it to your advantage and never do anything to separate your plants from the precious earth.
Things you should never do with plants over the winter.
1. Do not put them up on pallets. That separates them from the ground where they are the most comfortable and allows cold dry air to completely surround the pot or root ball.
2. Do not bring them in where it is artificially warm. They need to go dormant, and they need to stay dormant.
3. Do not put them in your garage. They are not a lawn mower. Garages are really, really cold, and dry. That’s the worst combination of all. Plants need to be moist over the winter. Not soaking wet, just adequately moist.
4. Do not put them in your tool shed. Same thing. Many tool sheds have raised floors allowing bitter cold air under the shed. They are dry places. Good for tools and power equipment, not so good for plants.
The lower the hoop house the better for the plants.
If you’ve paid any attention to what most nurseries do for the winter this advice seems to be contradictory. But it’s not. They know the advantages of building low structures for over wintering plants and it’s not always necessary, and for those big growers it’s not always practical. But if you really look around their nurseries, you are likely to find a low hoop house like we are building here. Not many, but they do use them for special situations.
Why lower hoop houses are better.
Low hoop houses are close to the ground and we already discussed the advantages of ground heat. They have much less dead air space between the top of the plants and the inside top of the hoop house. That means higher humidity and a much lower need for you to water over the winter. However, it certainly won’t hurt for you to poke a hole in the plastic and spray the garden hose around inside of your hoop house once a month or so. If things are frozen and you can’t water, then you can’t and chances are your plants will be fine. Just make sure they are plenty moist and or snow covered when you cover them trapping in all of that moisture.
Did you catch that? Snow covered. Snow won’t hurt your plants and most cases it’s good for them. It’s plenty moist and snow is a great insulator. Did you know that when the ground is frozen then a heavy layer of snow falls, the ground will actually thaw under the snow because the snow actually keeps the ground protected from the harsh cold from above and the natural ground heat from below thaws the frozen soil.
That’s an important lesson to grasp because you can use that information to your advantage as a grower.
Do Not Cover Your Plants Until they are Dormant!
I mentioned covering your plants when they are snow covered. Often times it will snow before you have a hard freeze. Plants need that hard freeze where the temperatures dip below freezing for several hours in order to trigger them into dormancy. You can have snow fall, but still not enough of hard freeze to trigger dormancy. This year here in northern Ohio is a perfect example. It’s November 7th, we’ve had a bit of snow, a few days ago it got cold enough to freeze the top layer of water in
the donkeys water bucket, but it still didn’t get quite cold enough to knock the leaves off the trees. I am patiently waiting for that to happen so I can start digging Japanese maples.
Why do big growers use such large and high hoop houses if lower houses are better?
Another great question, you are really on your game today!
Big growers are big growers and they do things in big ways. They like really wide hoop houses that hold lots and lots of plants. And they like to maximize every square inch of space they use. Narrower hoop houses mean more driving isles between the hoop houses and that’s a lot of wasted space. So they make the houses really wide, up to 40′ wide. That means in order for the structure to hold up to a snow load it has to be much higher in the center in order to have the support that it needs.
Big growers leave their hoop houses up year round, they just cover them with white plastic for the winter and uncover them in the spring. Big growers like high wide hoop houses because they can walk through them and even drive tractors through them. Keep in mind, being that the structures are up year round they work inside of these hoop houses daily.
What are the downsides to a wide, high hoop house?
A high hoop house unless professionally designed is more like to collapse from a snow load. High hoop houses have a ton of dead air space between the plants and the inside top of the hoop house. That makes it really difficult to maintain a high enough level of humidity. Because of that, big growers have to water inside of those big houses about every three weeks.
Now think about that.
We already learned that plants inside of a hoop house do freeze and are often frozen most of the winter. So that means that the irrigation inside of the hoop houses has to be winterized. Then every three weeks when they need to water the lines have to be reconnected and charged with water, then disconnected and drained again. That’s a ton of time consuming work every three weeks and it also means that the water lines going to those houses have to be buried at least 48″ deep. That’s the standard for water lines in northern states. In other words, those houses have to be engineered with all of this in mind.
Open the doors, close the doors. Open the doors, close the doors.
On warm days large hoop houses have to be opened up on both ends to keep the heat from building up and tricking the plants into thinking it’s spring. We have a large grower right down the road here who has about 2,000 large hoop houses. The manager told me that on a warm day they send out a crew of ten people to open all the doors on both ends of the houses and it takes those ten people almost half a day just to get them opened up. Then if it’s going to get cold that night, they have to close them again.
And of course all of this opening and closing is letting the moist air out and the dry air in increasing the need to run the water.
Do Mini Hoop Houses have to be watered over the winter?
Not really. In most cases if you make sure the plants are plenty moist the day you cover them they should be fine for the entire winter. Huge advantage. Like I mentioned above, if you get the chance take out a little insurance and spray some water inside to make sure, but if you can’t, chance are the plants will be moist enough.
Okay, let’s build a Mini Hoop House!
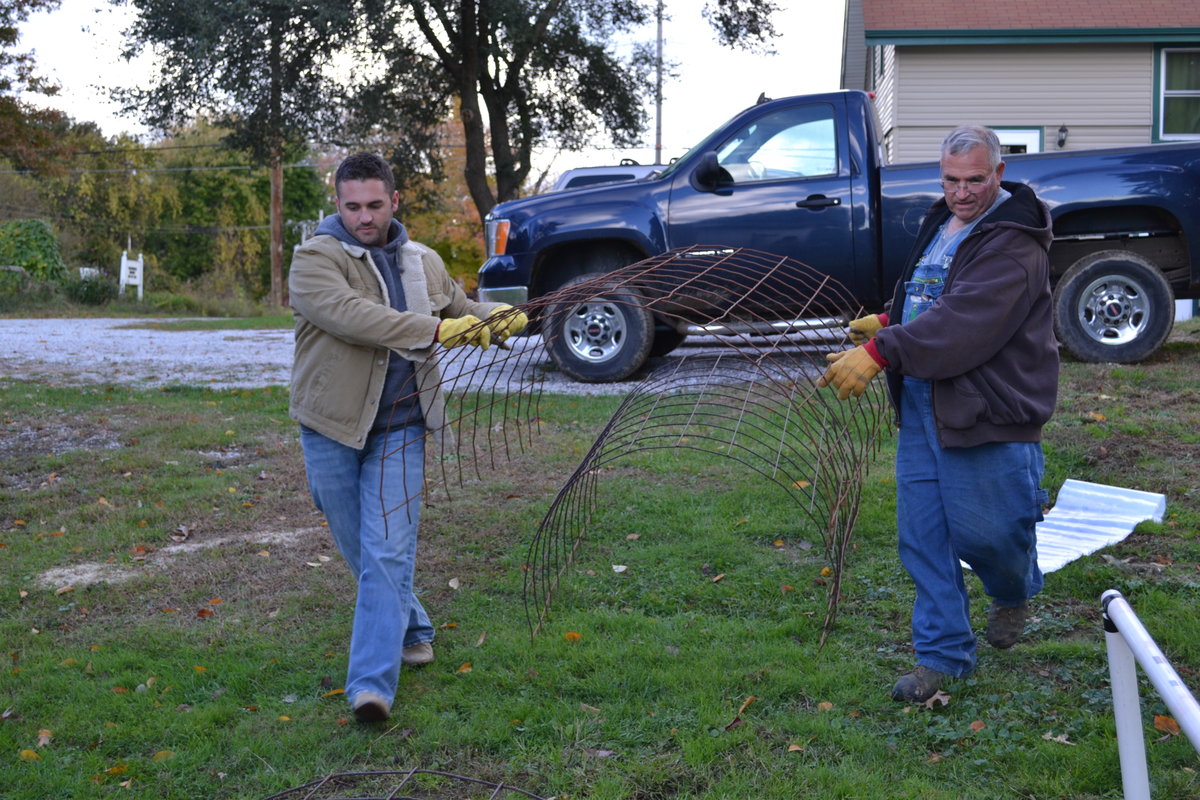
Building a Mini Hoop House with concrete reinforcing mesh.
The mini hoops that you see Duston and I putting in place here is actually concrete reinforcing mesh normally used in concrete driveways and sidewalks to strengthen the concrete. The bed that we are covering is 44″ wide, we cut the concrete mesh into 7′ long pieces. The plastic that we will roll over top is 10′ wide leaving about 18″ on each side so we can weight down the plastic with sand or soil on both sides and both ends.
Look closely and see where we cut the hoops. We cut right in the middle of a square, that leaves short little legs that we can press into the ground on each side of the bed to keep the hoop from popping outward.
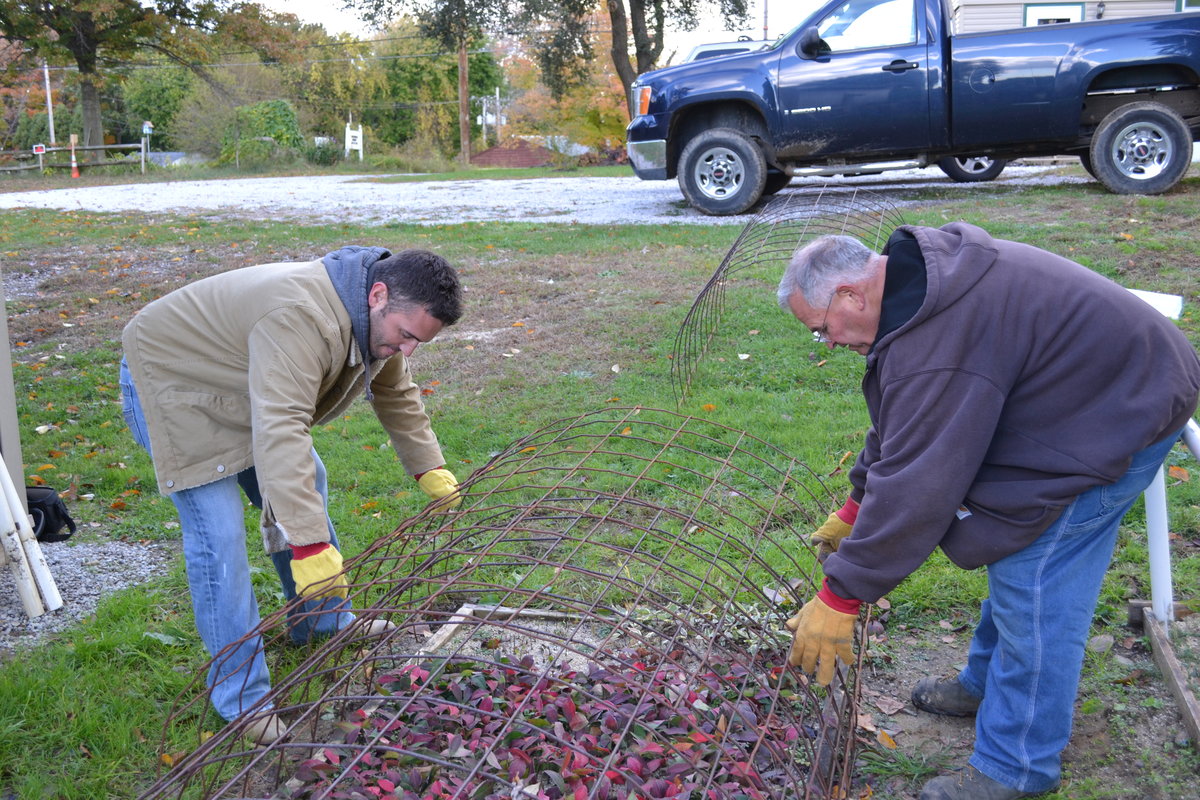
Covering rooted cuttings for the winter.
As we walk these hoops into place we overlap them just a few inches.
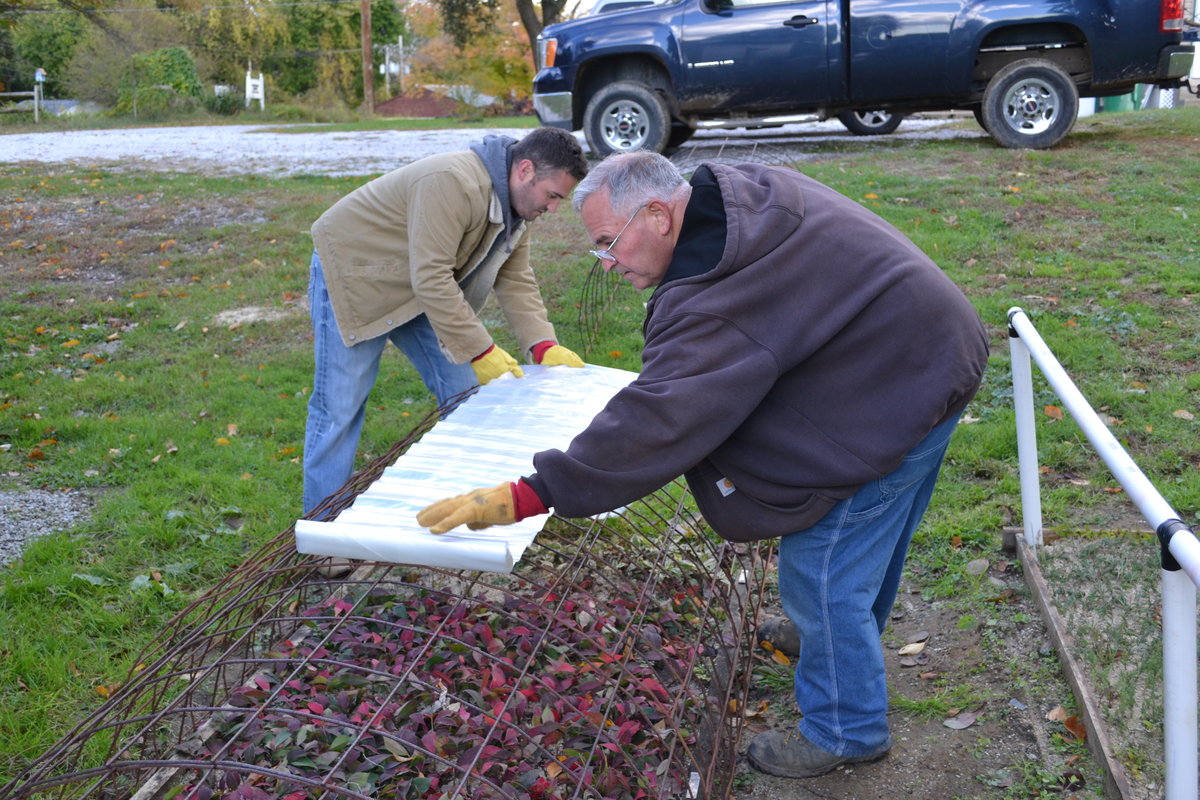
Using plastic to cover small plants for the winter.
The plastic is 10′ wide so we roll it over the mini house long ways, leaving enough over hanging the end so we can weight it down to hold it in place. The plastic that we have in this photos is clear, therefore it has to be painted with white latex paint as soon as the house is covered and weighted down.
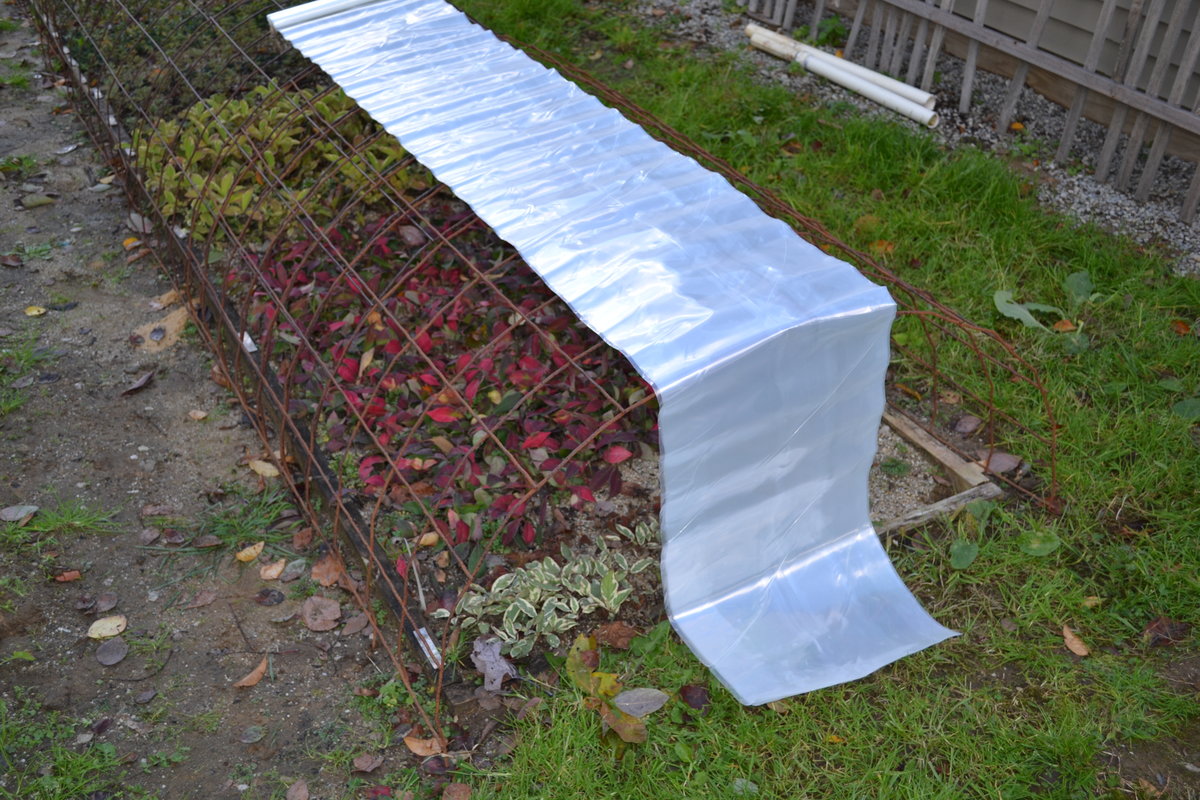
Over wintering plants with a mini hoop house.
Once we have the plastic rolled out from end to end over the mini hoop house we open it up and pull it to the ground making sure that we have about 18″ of extra plastic all the way around. From here follow these simple steps.
1. Open up the plastic and weight it down with sand or soil. You cannot use bricks, blocks or lumber to hold the plastic down, it just won’t work. The wind will pull the plastic loose and once the plastic is loose it will start flapping and eventually tear or come loose exposing your plants to the elements.
2. Make sure the plastic is very taught so it cannot be moved by the wind. As you pour on the sand or soil be sure to pull the plastic nice and tight and weight down the plastic all the way along the edges. Do not leave any spots along the edge where there is no sand. I prefer sand because it won’t get muddy and come spring it can be spread out and pretty much disappear whereas soil could be muddy and create a weed situation.
3. If you’ve used clear plastic you must immediately slosh on some white latex paint so the rays of the sun bounce off the plastic. You can buy 10′ wide white plastic at a nursery supply house.
4. If you have an opportunity over the winter when your garden hose is not frozen, just poke a small hole in the plastic and spray some water around in the house. All it can do is help. If you can’t water inside, with a low structure like this you are probably fine.
If you have taller plants to cover you can still use these mini hoops, just water the plants really, really well, then lay them over on their side. The first row you might want to prop up with something so they are not laying in the soil all winter. Maybe a bail of straw. The rest will lay on each other, then cover as we did here.
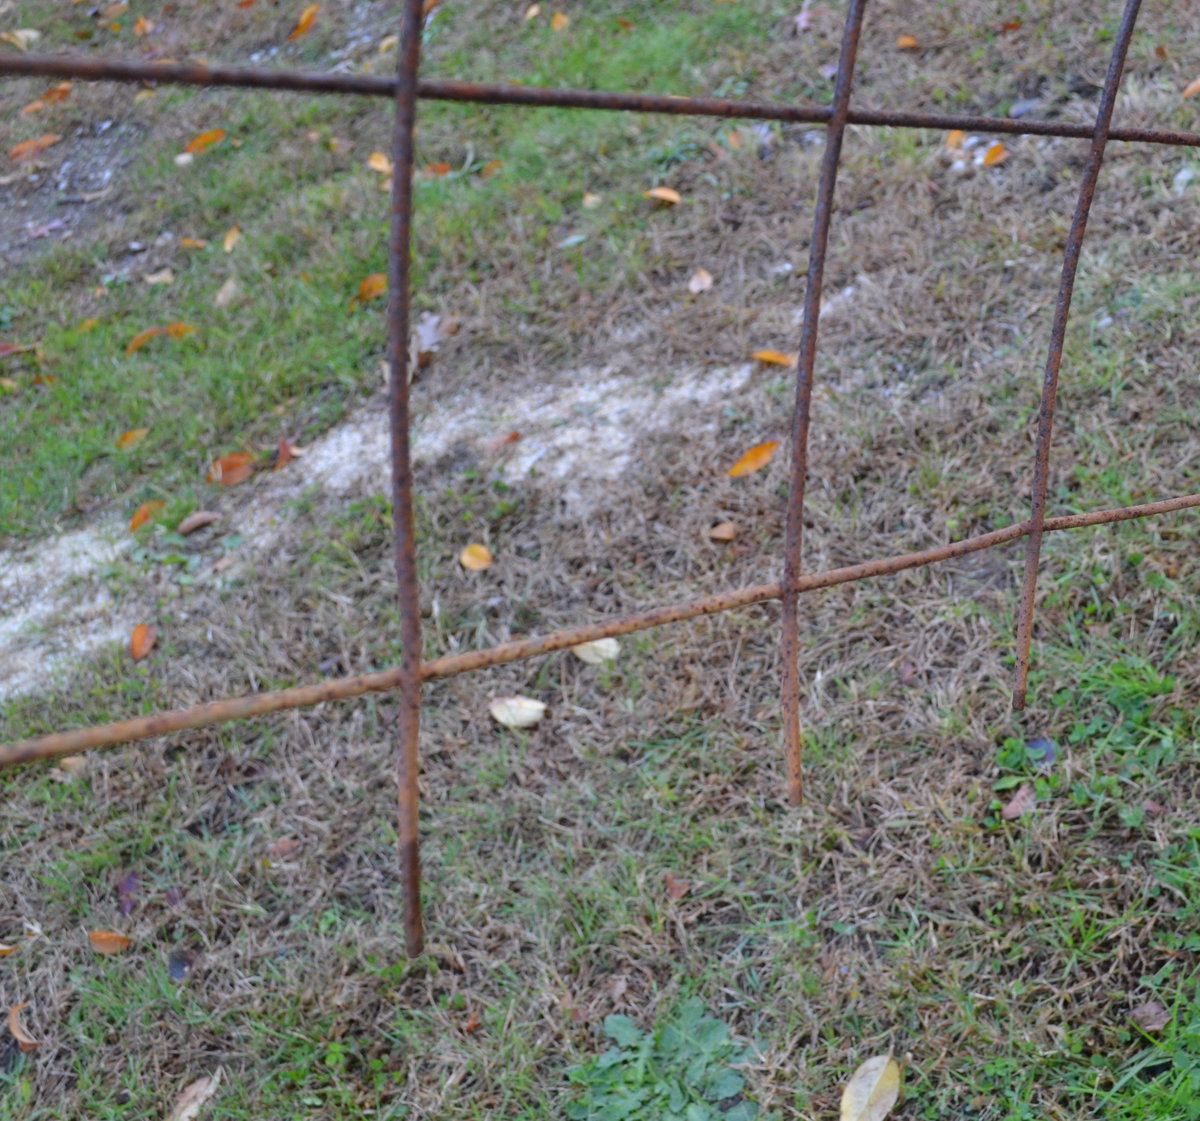
Mini Hoop House made of concrete reinforcing mesh.
This photo shows how we cut in the middle of the square to get little legs to stick in the ground. You really need a small pair of bolt cutters to cut the wire mesh.
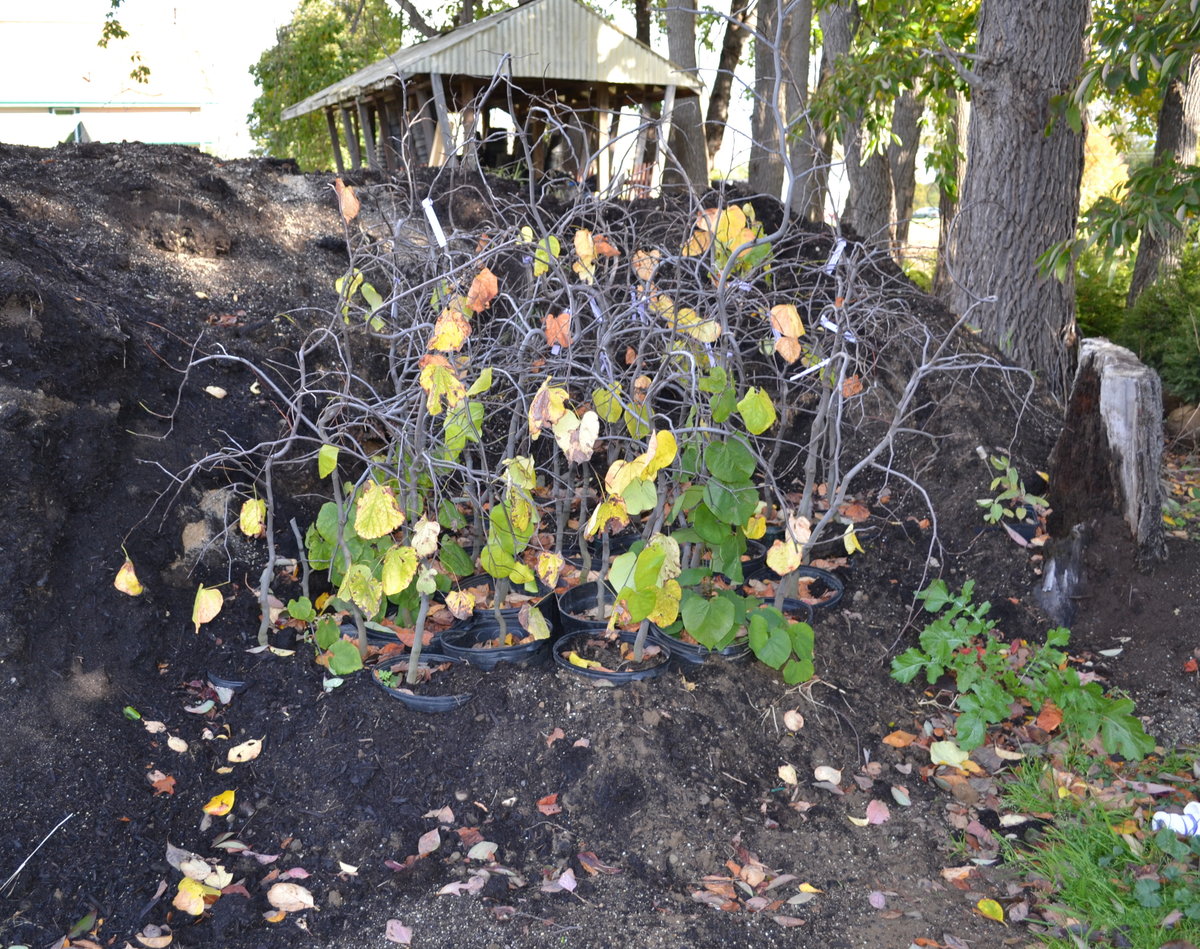
Heeling in trees for the winter.
These Lavender Twist Redbud trees are too big to cover with a mini hoop house so I moved them to the south east side of my potting soil pile, dug out a small area for them, protected from the wind by the potting soil pile, then I packed potting soil around the pots and a little over the pots. They should be quite happy there for the winter. This will keep the roots from drying out.
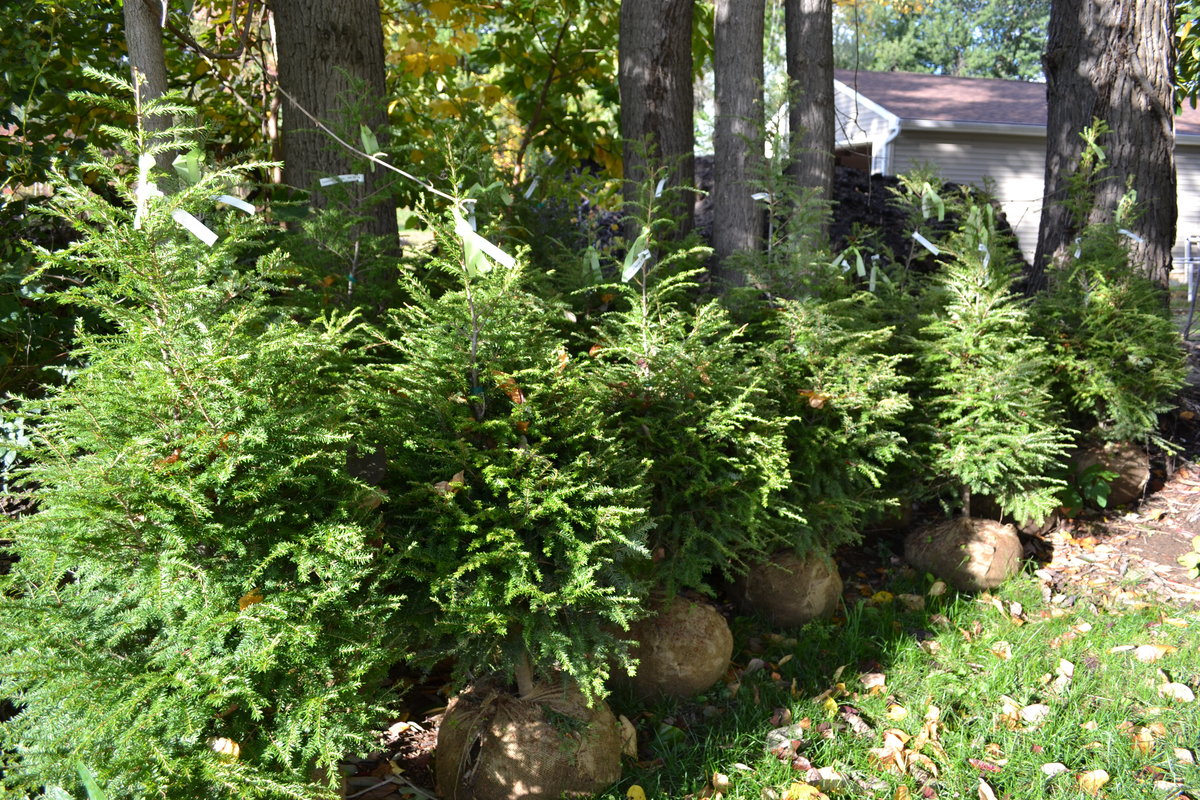
Heeling in Canadian Hemlocks for the winter.
Same for these Canadian Hemlock. We moved them to a protected area, then were just going to pack some leaves around the root balls, but I changed my mind about that. The burlap on these trees is regular, untreated burlap and by spring the bottoms will be rotted out of these root balls. So our plans are to first put these into some large pots that we have laying around, cover the root ball with soil, then as the burlap rots we have them pre potted and they will root into the pot. That way they can be easily moved in the spring without breaking the root balls and we won’t have to re-burlap them in the spring.
When the leaves really start falling we’ll collect some leaves and pack around these root balls to keep them warm and moist.
As a side note about burlap. I have about 450 Japanese maples to get dug over the winter and those we will put in a poly burlap that will not rot.
Mouse Bait, mouse bait, mouse bait, mouse bait!
Did I mention mouse bait?
When you take these kinds of measures to protect your plants from the harsh winter winds you are at the same time creating a perfect place for things like rabbits, chipmunks and mice to spend the winter. They will love you for making their winter home for them. They will also eat and kill your plants.
Mice kill plants all the time!
Mice seem really harmless, but when they nest in and around your plants they will eat the plants, often times eating the bark off the stem of the plants completely girdling them and killing the plants. The damage seems small and harmless, but keep in mind, your plants receive all of their nutrition though the cambium layer of tissue that is found right below the bark. And on some plants, that cambium tissue must be quite tasty because they can and will eat it up as far as they can reach standing on their itty bitty back legs.
I knew this guy once that thought the chipmunks in his yard were cute so he wouldn’t use mouse bait. That winter the mice ate about $5,000 worth of my recently grafted Japanese maples. Can you imagine? One winter they also ate all of my rooted cuttings. Except the Red Twig Dogwood, apparently they didn’t like those. But the rest of the cuttings were chewed off right at ground level. About 50% of them came back nice and full so it wasn’t a total loss. But honestly, they mowed them off at the soil level. The mice just moved in and set up house under the plastic with a built in food source.
I don’t like to kill things, but in this business you can’t let rodents eat you out of business no matter how cute they are.
You can buy weather resistant mouse bait blocks at a farm supply store.
Be careful. The bait is poisonous to pets and dead rodents that have been poisoned are deadly to pets as well.


 Just when you've tucked everything in for the winter, prayed for a mild season and begun to peruse the seed catalogs, low and behold the Camellia out does itself in the back garden! What a joy to find these beautiful blooms when everything else is dormant. Not only do they brighten up a dreary landscape but they are wonderful in the house as cut flowers too.
 Early in January the big red one beside my basement door will be covered with flowers - sometimes in the snow! Around late February or March the two toned red and white one will flower. It looks like a peppermint candy dripped all over it. It is one of my favorites because it is the same variety as the one my mom tenderly carried to Alabama when we moved from Florida when I was about 10. That bush bloomed in our laundry room the first winter. Mom had placed it there until she could plant it in the spring. I thought it was the prettiest thing I had ever seen.
 Remove any spent flowers or rose hips at this time. Clean up fallen leaves and petals from around the rose bush, to prevent black spot and other diseases from wintering over. Dusting the area with Sulfur will also help control disease and insects trying to winter over. Grafted roses need mulch to protect the graft bud from injury during the winter. Own-root roses are typically better at surviving winters than grafted roses. What’s an own-root rose? These are roses that grow on their own roots, often Heritage or Old Garden Roses. Grafted roses have a bud or swelling just above the roots, where two different roses have been joined together. Grafted or own-root, all roses will benefit from mounding mulch up around the canes. This will serve to keep the ground stable and to prevent damage to the rose as the ground freezes and thaws during the course of the winter. This will also help retain moisture. Soil Pep makes an excellent mulch for roses, as well as other perennials. It stays in place well and breaks down slowly, gradually improving the soil. Adding Rose Collars will help keep the mulch in place through the winter. Water your roses (and other shrubs, trees, perennials) during the course of the winter. Pick a day when the temperature is above 40°. Water around mid-day and confine your watering to the base of the rose. You want to get water to the roots, not the top of the rose. As always, you are welcome to bring your gardening questions or concerns to the Diagnostic Center in the Hardgoods section of the store.


 When we first came and viewed this property the pond was low and there was a white lacy looking substance on the ground around it. I realized later that this was dried pond weed, and I wondered if it had any use.