Friday, July 31, 2015

Growing Vegetables in Containers Revisited


I think I should rename my blog "Rainy Day Gardening" I can't seem to get out of the garden long enough to write unless it rains, something that has not happened much around here in the last month but I gratefully woke up to thunder and rain this morning.

If you read my post about Fool Proof Container Gardening you will know exactly what I am addressing here. If not, give it a read. I've learned much more about growing veggies in these little containers and have changed how I am going to do it next year.

First I wondered if it was really necessary to add all that shelving and drainage etc in the bottom. I am all about simplifying my life and saving time as well as money. If I could drill a few more holes in the side of the containers (about 3 inches up from the bottom) I figured I could put the PVC pipe in to add water to the bottom, fill that container with soil, add my fertilizer layer, finish the fill and plant. The drain holes would allow excess water to drain out but still leave water in the bottom for the soil to wick up. I tried it and Wala! This worked as well as the ones I spent hours building!

An extra plus for my new idea was no mosquitoes. I discovered that mosquitoes loved the standing water in the old containers and I needed to add mosquito dunks to the pots to kill the larvae. I just dropped them down the PVC pipe.

I also ended up taking the plastic off the tops of all my containers. I think it was adding too much heat and causing my plants to wilt from that heat. Next year I'll skip that step also.

Lots more plants would fit into one container than I originally thought. Here is one with a tomato, basil, 2 egg plants, squash and pepper! All happy. See my little egg plant fruit.

Another lesson learned: I assumed - never do that by the way :-) - anyway, I assumed that by having my plants up off the ground I would not have a problem with insects that have larvae in the soil. Wrong! I got squash borers in my lovely yellow squash plants just as they were beginning to bear fruit. I immediately slit the top of the stem where the damage was and removed those bad boys. I then buried that wounded portion of the vine so it could make new roots. this is not always successful because one never knows for sure if one has found all the borers, I was blessed because all my vines but one survived and are busy making little squash casseroles for me.

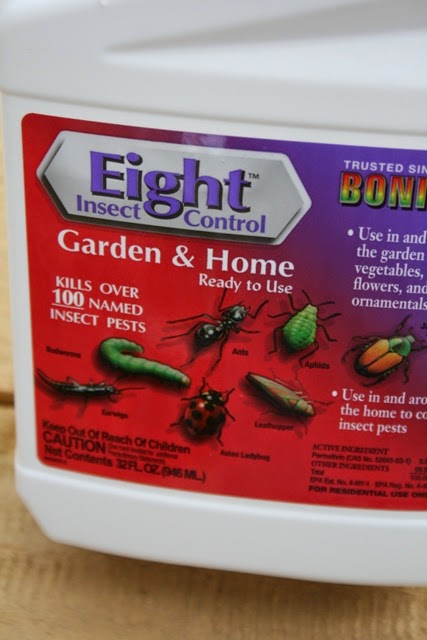
To prevent borers in the cukes I just planted, I placed aluminum foil around the plants when they were about 3 inches tall. I read this confuses the moth and prevents it from laying the eggs that make the nasty things in the first place. The jury is still out on that one because they are not big enough yet to harbour the critters.

All things considered, I am very happy with my containers and will certainly add more next year. I did find that the ones I placed beside my house on the southwest side did much better than the ones that did not receive as much sun - pretty much a no brainer. I did have to move the containers away from the house a little 'cause my light colored siding was putting out lots of heat in the late afternoon - wilty plants!

Another little tidbit: I gave up trying to get rid of the mildew. the natural mildew treatment did work but mildew would come back somewhere else in a few days. I blame it on our terribly humid summers here in Middle Tennessee. It did not seem to hurt the fruit production just made the plants look bad.

About that fertilizer layer: I used 3 months timed release. I needed to fertilize the containers in early July because my 3 months were up. I just sprinkled it right on top of the soil. Everybody seems to be happy and productive now.

I'll be adding new containers for peas, winter squash and more salad greens soon. I have all sorts of containers in my yard. Look at how great the basil and peppers are doing in this pot.

Next year I'll start my tomatoes early in the greenhouse and grow everything on that southwest location or beside my deck where the suns shines until about 3 PM.

Happy Container Growing!

Thursday, July 30, 2015

What’s that white stuff on my plants?


Powdery mildew is a common plant disease. It appears as splotches of white or gray on leaves and stems, as if the plant was dusted with talcum powder.  It comes as a surprise to some that powdery mildew can happen in the dry Colorado climate, but powdery mildews can be severe in warm, arid climates.  How bad powdery mildew becomes depends on several things, including the type, age and condition of the plant and the weather conditions. Powdery mildews are host plant specific, so cucumber and lilac side by side will be infected by different strains of powdery mildew. They won’t “give” each other the disease. That said, there are you can treat both plants with the same approach.  

Avoid overhead watering and do your watering in the early morning, so the plant has a chance to dry. Improve air circulation by pruning plants that are over-crowded or bushy.  Keep an eye on your plants and prune out any suspicious leaves when you first see them. Use a fungicide.

Fungicides rated for powdery mildew can be used on vegetables and ornamentals. You don’t have to have a specific fungicide for each plant type. Sulfur can be applied as a dust or spray. Note that Safer® Garden Fungicide is OMRI rated. Potassium bicarbonate is a highly effective fungicide. GreenCure® is rated for organic gardening.


Finally, clean up your garden in the fall. Fungus can overwinter in the debris left in the garden, so it’s best to remove all debris and dispose of it. Don’t add to your compost pile.  

Wednesday, July 29, 2015

Summer Rose Care Tips


“My roses don’t look good” is a comment we’re hearing more of lately. July’s rain followed by the heat has left roses as well as other plants struggling with a variety of issues. Here are some things to do to keep your roses looking good.
First of all, keep up with the pruning by removing spent blossoms before they go to seed.
Removing faded blossoms stimulates the roses to grow and produce more blooms.
Feed your roses with Fertilome Rose Food or Mile High Rose Food. Feeding now will encourage stronger growth and better blooms through the rest of summer. Check for insects, particularly aphids.
Use a general insect spray such as Eight or buy and release some ladybugs near your roses.
Watch out for diseases, such as black spot or powdery mildew.
You can control these with Safer Garden Fungicide, Serenade or Green Cure concentrate. All of these products are organic.  
If the leaves on your roses are looking pale and adding iron didn’t help, use some Magnesium Sulfate (Epsom Salts) to restore the dark, rich green to your rose plants. Doing these things now will help your roses healthy and blooming, well into fall.

Monday, July 27, 2015

No Cook Tomato Basil Soup

If you haven't figured out by now, I'm a shortcut taker and love a quick easy tip, recipe, craft or garden tip. I threw together this fresh tomato basil soup this morning and I want to share the recipe with you.

Bill and I love the Tomato Basil soup from our favorite local restaurant. Always one to experiment in the kitchen, I thought I would try to invent my own. Here's what I did and we liked it a bunch!

Ingredients for one quart of soup

About 2 pounds of fresh tomatoes
1 small bell pepper (I actually used half because Bill thinks it exacerbates his arthritis)
1/4 cut fresh Basil leaves
2 slices of red onion
1 or 2 fresh garlic cloves
fresh parsley to taste - I used dwarf curly because it is still growing nicely in my yard.
1 Tablespoon course sea salt
1 Teaspoon fresh ground black pepper

I used my blender for this - Don't try it with a food processor unless you make it is small batches - I learned this the hard way. All this together in my processor made a big mess! It overflowed all over my kitchen counter!

I cut my tomatoes into quarters (did not peel) and tossed them along with all the other ingredients into my blender. I punched the puree button and let it go until the consistency was what I wanted. If you don't like tomato seeds you can strain the mixture at this point. I didn't bother to strain.

This soup is great cold or heated. If you want a thicker soup, make a rue of Olive oil and flour ( brown rice flour for gluten free) as follows:

3 tablespoons oil
1/4 cup flour

In a 2 quart sauce pan. whisk flour into the oil until a thick, rough paste forms. Whisk constantly while it bubbles over medium heat.If it thickens too fast add a little more oil. As it cooks, the roux will become smooth and begin to thin a little. Add your soup mix and simmer, stirring constantly until it begins to thicken. Remove from heat and serve hot or put in refrigerator and serve later as a cold soup.


Quick post to give you a link that came in my mailbox this morning. Some good tips here for vacation watering of container plants. Dave's Garden

Sunday, July 26, 2015

Ground Covers, Rain Barrels and Other Garden Trivia


Found on the web: "Ground covers for slopes: Try acacia redolens, coyote bush, prostrate myoporum and trailing lantana. To water them, remove coffee can bottoms and place above the plants with emitters in cans, so water goes directly to the root ball and stops erosion." I am landscaping a steep bank right now and I really like that coffee can idea. I think I will bury large yogurt containers instead - won't rust. I'm going to poke holes in the bottom and bury them up under the plants I want to water. The butterflies are enjoying the Lantana in front of my fence.


This one is from Gardening Memos Blog
"Rain barrels collect water from your roof and store it until needed. Rain water is softer and chemical free. Rain Barrels are great for keeping your plants healthy and saving water. Many rain barrels are made from reused food drums and recycled plastic, keeping with the commitment to sustainable living. You can collect approximately 675 gallons of rain off your roof from a single rain storm. Stored rain water supplies much needed moisture to your gardens during extreme dry spells where rationing is necessary." Look at the one we just put behind the art studio. I used a rain chain because of the weird gutter situation we have back there. As you can see, we have lots of landscaping to do in this area. Tomorrow my son from Patterson Foundation Services (got to plug the kid's business) : ) and his helper are coming to fix my wet basement. I had to dig up all my flower beds in the front of the house. All plants are mulched in for the duration behind the privacy fence. By this time next year, I should be to the point of maintain only! Yeah! Actually, I don't think gardeners ever get to that place; there is always a plant to move or a new variety that we must try. I'm going to post before and after picts - here's where we are today, tomorrow the bushes will be joining their friends behind the fence. I opted for the excavator to remove them -saved my back and probably the plants too.


I think my little round lily bed in the front will be safe where it is - Tony, Josh's helper is a gardener too and he promised to rescue any plants that Josh and the excavator might threaten; probably a good thing that I have to work next week.

It's what to do with all that Basil time!


My work buddy, prayer partner and fellow plant addict, Beverly sent me this terrific recipe for mini caprese salad. I've made basil, tomato and garlic salad for ages but this takes it to a new level!

Here's her recipe:
Ingredients
1 lemon, juiced
1 small clove garlic, grated or minced
1 cup basil leaves, about 20 leaves, plus a few for garnish
1/3 cup extra-virgin olive oil
1 pint heirloom cherry tomatoes, multi-colored if available, halved
1 cup bocconcini (bite-sized fresh mozzarella balls), drained, halved
Salt and freshly ground black pepper
Directions
Combine lemon juice, garlic, basil in food processor or blender, process and stream in extra-virgin olive oil to form a smooth dressing. Combine tomatoes, cheese and dressing in a bowl and season with salt and pepper, to taste. Garnish with a few torn basil leaves.


To see a zillion different ways to serve this yummy concoction clink the Pinterest link below
 http://pinterest.com/search/pins/?q=mini%20caprese%20salad&rs=ac&len=18

Thanks, Beverly!

Saturday, July 25, 2015

Fun Gardening, Cooking and Craft videos!

OK I'm guilty. I spent way too much time today on Youube. But  it is a Saturday morning after all - or was when I started! LOL!

Here are a few awesome tips I found there.


and one more...these girls are sort of silly but it's a cute idea.


Friday, July 24, 2015

5 Applications to Help you Design Your Own Garden


computer_1567645c

This article, I admit to writing with a massive pinch of salt, because most people understand that the computer is only as creative as the person using it.

At T
he Oxford College of Garden Design we teach VectorWorks Landmark, but this is  expensive and more complex than most homeowners need. For those wishing to have a go them selves, we have several 4 week online courses at MyGardenSchool on both planting and landscape design. The following list of software I hope may be of interest to those wishing to have a go themselves.

SmartDraw 2010
SmartDraw is a drawing application to design floor plans business graphics, diagrams and charts of all kinds. The program improves communication, organization, management and planning by drawing any processes. If you know Microsoft’s Visio, this program will be familiar to you. The application also has tutorials to help.


DeltaCad
DeltaCad is more than just a paint program, because you can edit, scale, move, rotate, copy, etc. individual objects, not just paint pixels. DeltaCad allows you to zoom in to draw fine details or zoom out to see the whole drawing.


Showoff Home Design
The program features many in-built tools and options. The user needs Internet connection to work with the application. It features a category list with an option to choose annuals. The catalogue tab helps to choose from landscape plants, home improvements, furnishings and décor, or other items that cover a broad range of home improvements.


Realtime Landscaping Architect
New landscape design software for creating professional plans and presentations. Design houses, decks, fencing, yards, gardens, swimming pools, water features, and much more with easy-to-use tools. Give your plans a hand-drawn look using a wide variety of plant symbols and colour washes. Add plant labels automatically using the wizard, and add a plant legend with just a few mouse clicks.

Home Designer Landscape and Deck
With Home Designer Landscape & Deck by Chief Architect Software you can plan and design your perfect outdoor living space! Landscape & Deck makes it easy to quickly design the virtual look and feel of your backyard, deck, patio, pool or other outdoor project. Just point-and-click to add pre-arranged landscaping beds and any of over 4,000 Library items and over 3,600 realistic plants to your design.

Class Of 2007/2008….Where Are They Now?

It’s less than a month since the OCGD post-grad intake of 2007/2008 wowed the industry with their end-of-term Student Exhibition and while the course is structured so that students complete a summer planting portfolio and so do not graduate before the Autumn, many of them are already launched and working on impressive projects.

For example, Susan Clark, (www.thegardenagency.uk.com) a journalist who decided to take to the OCGD course so she could write more knowledgeably on garden design, has been commissioned by the top UK film director Gurinder Chadha, (Bend It Like Beckham…and her new film is the quirky teen smash Angus, Thongs & Perfect Snogging) to design the outdoor space at her new Primrose Hill family home, including a large roof terrace, Japanese-style adult courtyard and kids’ play garden and Christopher James, a fellow Class of 2007/2008 student, has been snapped up by another former OCGD London designer and success story, Charlotte Rowe.

And as if that wasn’t glamorous enough, half-way through the course, student-turned-presenter, Shatsi Sabri, landed her own tv garden series fronting a garden show for a Pakistani production company which has just been commissioned for a second series.

For more updates on Where Are They Now? for the Class of 2007/2008 and previous years, check in on the website where we’ll be posting interviews with OCGD students who have successfully launched design careers and for an insight into why they are so successful, or register for update alerts for my garden design blog

Thursday, July 23, 2015

It’s Time to Divide Bearded Iris


Over time, iris become crowded and they stop blooming, so it’s important to dig and divide iris about every 3-4 years in order to reinvigorate the plant. 
 
 
Iris grow in clumps and the root of an iris is called a rhizome. It is the rhizome that we are going to lift carefully, using a garden fork. You can use a shovel, but be careful to not damage the rhizomes.


Once out of the ground, cut or break apart the rhizomes into sections,  with a healthy set of leaves and firm, tan/white roots.
 
Get rid of rhizomes that are soft, mushy or have holes in them. Holes indicate the presence of iris borers, so you will want to treat the plants you choose to keep, with a garden dust such as Sevin or Eight.
 
 
Next, cut the leaves back to about a third of their length.
 
You are now ready to re-plant. Iris rhizomes grow away from the toe, in the direction of the heel, so keep this in mind as you plant. Iris need well drained soil, so take time to amend your soil with Sheep, Peat and Compost. Add some Bone Meal and place the rhizome in the hole, roots spread out and cover with soil deep enough to just cover the top of the rhizome. Water well and add more soil if necessary. Your iris will establish themselves through the fall and early winter and be ready to bloom for you next spring.
 

OCGD TV Gardens Scoop!

I am very pleased to say that an astonishing THREE of the twelve UK gardens selected for a the new tv programme on the very best gardens in Britain have links with the Oxford College of Garden Design (www.ocgd.org).

They are, my garden Greystone; and the gardens of former OCGD graduates, Julia Kirkham and Kathy Brown.

The programme, Own Britain’s Best Gardens, is a Thames TalkBack TV production for Channel 5 and will be aired later this year (watch this blog for details of when).
The presenter is the flamboyant Lawrence Llewellyn-Bowen who has spent the last month visiting the gardens and, together with a panel of top judges, quizzing their creators on what makes these gardens so special.

If the tv producers are right, and 25% of the gardens chosen to represent the best in Britain have been designed by OCGD tutors or students, then what does that say about the course?

It says this really is one of the most prestigious garden design courses in the world (never mind the UK).

Wednesday, July 22, 2015

Plants that attract pollinators: Penstemon


Penstemon, known as beard-tongues are native North American wildflowers available in a good variety of pastel reds, pinks, and blues and white. Penstemon does best planted in a spot where they will get full sun.
 
They like well drained soils, so be sure to add a bag of Earth Essential’s Sheep, Peat and Compost to your soil as you’re planting. Once established, penstemon are very hardy plants, requiring little water and fertilizer. You can cut back the plants by about 1/3rd after they’re through blooming. Hummingbirds are attracted to the red and pink varieties. Bees seem to prefer the whites, blues and purples. As for the Penstemon‘s common name, beardtongue refers to the flowers open mouth shape and fuzzy tongue. Here are some of our favorite penstemon.


'Carolyn’s Hope Pink'

'Dark Towers'

'Lavender Riding Hood'

'Marble Riding Hood'

'Pike’s Peak Purple'


'Rondo'

'Rubycunda'


Own Britain’s Best Gardens

Capitalising on the success of its hit series, Own Britain’s Best Homes, Channel 5 has launched the hunt for UK gardens to feature in a new follow-on series, Own Britain’s Best Gardens and guess where the producers have landed…..Greystone.

Greystone is my Oxfordshire home and this week, myself and my wife Carol, will play host to the show’s flamboyant presenter, Laurence Llewellyn-Bowen and a panel of Judges who will be spending two days filming at Greystone and discussing the design merits of the two-acre garden.

One of the key attractions to the programme-makers (Thames TalkBack TV) was the fact Greystone is a woodland garden with over 200 majestic beech trees. I designed the Greystone garden to take on a particular ambience at night when, using careful garden lighting, the trees take on an ethereal, almost Cathedral-like ambience. Stunning and very romantic!

What do I think about all this. Is Greystone the best garden in the UK? Probably not, but Carol and I would not swop it for anything.

As soon as we know when the programme will be aired, I'll publish it on the Oxford College of Garden design website.

Tuesday, July 21, 2015

Mushrooms Abounding but Not a One to Eat!

First it was mega hot and dry for weeks and then we got rain. Boy, did we get rain! I truly grateful for therain but I also got some real strange fungi growing in my yard. I'm hoping some of you may be able to identify some of them. If you can please leave me a comment.


Some are very pretty like the red and white ones and the cute tiny brown ones with notched edges below.

This shaggy one would be at home in The Shire with Frodo the Hobbit.

A few are down right gross and probably deadly.

    I even have them growing on trees and stumps!

I know they will spray spores all over the place and keep coming back. Anybody got any ideas about how to rid my yard of these creepy things?


Monday, July 20, 2015

Organic Pest Control, Crepe Myrtles and other Goodies


As I promised, I have some good information that I found while checking out my Twitter contacts! I also added a couple of organic growing mixes at the end of this blog that have worked for me. The first link is a about planting herbs to deter garden pests and attract good insects. To see which ones are good for what, click here Natural Pest Control in the Garden: Herbal Companion Plants make Organic Gardening Easy

The next ones are articles that I found interesting about Crepe Myrtles. I love Crepe Myrtles. I moved away from the most beautiful ones that my husband's first wife had planted before she got sick. I would have dug them up if they had not been so large. I planted a new one in my yard here two years ago and it has had a hard time with the Japanese beetles. Do you ever wonder why God created Japanese Beetles and Mosquitoes? Anyway, here's the links Crepe Myrtles and Crepe Myrtle Planting Instructions


The following recipe has worked for me when I didn't want to spend the money on fungicides - it has worked for meal bugs too. My plants that I winter over inside seem to be prone to these little pesky critters. I have sprayed this on roses for black spot too.


1 cup dish detergent

1 cup strong Chamomile tea (I use 3 tea bags to 1 cup water)

1 cup Listerine or other antiseptic mouthwash

1 cup Murphy's Oil Soap


Mix it all up and pour it into a bottle sprayer. Drench the affected plants. Might take a second application in a week if the first one did not get all the bugs or fungus. You can use this as a preventive on roses in damp weather too.
I'm sure most of you know that Epsom Salts are good for nearly anything that flowers but did you know that if you add a cup of sugar to a cup of Epsom Salts it makes an even better bloom booster? You can put some of this mixture into the planting hole to give your plants a growing boost too.