Showing posts with label seeds. Show all posts

Friday, October 30, 2015

Saving Seeds

I grew many heirloom plants this year and I wanted to save the seeds of the ones I liked best. Several friends gave me heirloom veggies that I wanted to grow in my garden next year so I had to save those seeds for sure.

I have nosy squirrels and feed lots of birds so drying outside is not an option for me. I wanted to save seeds from my tomatoes, peppers and three varieties of Basil. The peppers were easy. A sheet of waxed paper, scrape out seeds of the best mature peppers and they were dry inside on my utility room counter in a day. I used the small enclosure card envelopes that you see above for all my seeds. (I buy mine from Nashville Wraps) Label them with variety and date. I store mine in a drawer in the studio until time to plant. I have sometimes stored seeds in airtight bags in the freezer. This works well if you have more than you need for one year and want to save longer.

Tomatoes are the worst but not hard. I use my tea strainer to rinse these seeds. I rinse and rub them around on the strainer until most of the slimy covering is gone. Then I spread them out on parchment paper to dry. After 24 hours I loosen them from the parchment paper but leave them to completely dry before I store them. I treat squash and pumpkin pretty much the same way.


Basil is easy, wait until the blooms form hard spikes. Cut them off and place in a paper bag to dry completely. Shake out the tiny black seeds and put them in envelopes. The seeds on the plants in this picture are about ready to harvest. My Tai Basil makes little rosettes instead of spikes but when they are dry, I put them in bags to cure like all the rest. Be sure to label your envelopes & drying bags – all basil seeds look alike!


Annual flowers work pretty much the same. Be sure your plants are not hybrid – these will sometimes not germinate or if they do they will revert back to the original wild stock. Marigolds, zinnia, cone flowers, cosmos and angel trumpets are easy to grow from seeds saved.

Why would anyone want to pay $2.00 and up for a tiny amount of seeds when you can save your own for free? Find a friend or two to trade seeds with and everyone is a winner!

Tuesday, March 31, 2015

Seed Starting 101


It’s that time of year again. I’m getting “what do I do now that I have my little seedlings” questions from friends and family. Since I started this blog to share what I’ve learned along the way and hopefully others will chime in via comments, I’m posting how I deal with seed starting and transplanting.

Seed Starting
There are probably as many ways to start seeds as there are kinds of seeds. I will only cover 3 of them here; under lights, winter sowing and direct sowing.
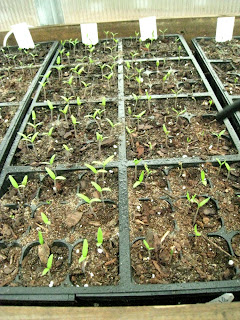
I have an earlier post about winter sowing and will only add a footnote here. My winter sown seeds sprouted at about the same time as the ones that I panicked and started around March 1st under lights in my basement. The pictures here were made on March 14th. Basement ones took from one to two weeks to germinate and honestly, I will probably not do winter sowing next year because the basement is faster and I am impatient. If you don’t have the space and don’t want to look at the light shelves in your house, winter sowing is the way to go.

Under lights: I use the seed starting flats with the plastic “greenhouse” tops. I save these year to year, even the liners that hold the seeds. I wash these out with a mild bleach solution before I store them to keep from spreading fungus, etc. Here is a picture of my shelves that Bill made for me out of PVC pipe. I store it in the basement but you could actually take it apart and store somewhere until you need it again. The plans were from the very first issue of Garden Gate Magazine. If anyone is interested, i might post the plans. I have built a couple of these over the years and they work great. I use cheap shop light fixtures with one warm and one cool spectrum florescent light tubes in each fixture. Hang the lights as close as possible to the sprouts and gradually raise them as the plants grow. I usually take the greenhouse tops off when my plants have one set of true leaves.

Direct sowing: If you have the patience to wait until a couple of weeks before your last frost date, you can sow your seed directly in the garden. Some seeds can only be sown this way. Carrots for instance, don’t transplant very well – read your seed packet for information about this. Cool weather crops like lettuce, spinach, radish, etc. will do well if sown as early as late January or February here in zone 6b. I planted lettuce in big pots on my deck this year in late January and today (March 31) I have pots full of inch tall seedling out there. Again the back of your seed packets will give you all in the information you need for this.

Transplanting
When your seedlings (planted inside or winter sown) have their second pair of true leaves, I will carefully pick them out of the seed trays, A kitchen fork works well for this, and pot them into 3 inch pots. As soon as the weather warms up to around 50 degrees I start hardening them off by placing them outside in a shady place a few hours everyday and after about a week of this, I move them into the sun for a few hours each day. Don’t let them dry out but don’t drown them either. Evenly damp is good. Also, take them in each night in case of a drop in temps below 40 or worse - a surprise frost. As soon as your last frost date – here in Mid Tennessee, it’s April 20, you can plant them in their permanent place in the garden. I have found that my plants do much better if I harden them off. There is much less rick of wilt than if I take them directly from the flats to the garden. I remember my Dad’s tomato plants in their little pots all lined up on the front porch rail every day and setting on the floor inside by the door at night.

Maybe this will help those of you who are first time gardeners or first time seed sowers. Anyone out there with additional information please chime in.


Tuesday, March 3, 2015

Some of my Favorite Garden Web Links

I spend quite a few hours a week searching and reading about gardening and plants. I've run upon a bunch of really great sources of information and plants over the years. Below are a few of my favorites and a brief description of them

Let's start with plant information. By far the best plant search and information site I have found is  Missouri Botanical Garden  plant search. You can search by common name or Latin name. There are pictures, plant info and growing tips http://www.missouribotanicalgarden.org/plantfinder/plantfindersearch.aspx

Dave's Garden is also a good place to search. You can subscribe for even more perks. Plants available for sale on this site too. http://davesgarden.com/

This link has good information on seed starting and other gardening tips on the sidebar http://www.prescottenews.com/index.php/features/columnists/ken-lain-watters-garden-center/item/22894-starting-seed-indoors

Fun tips and ideas here:  http://www.amateurgardening.com/category/how-to/

I've mentioned Mike McGroarty several times but his site remains one of the best sources of info out there;
http://mikesbackyardnursery.com/

University of Minnesota Extension has lots of features for gardeners too http://www.extension.umn.edu/garden/yard-garden/

The best free forum on the webhttp://www.gardenweb.com/  you can search by region, state, plant even birding etc.

This next one is a retail site that has great information about the plants they sell. I use it for growing info quite often Plant Delight Nursery http://www.plantdelights.com/#

Everything you ever want to know about perennials http://www.perennialplant.org/

FREE SEEDS HERE! http://www.wintersown.org/wseo1/Free_Seeds.html
http://www.heirloomseedswap.com/ 

Not free but good source of seeds http://www.southernexposure.com/

Some of my favorite plant sources
Walter's Gardens        Mary's Greenhouse in Tennessee     Gorge Top Gardens

Petals from the Past     White Flower Farm  lets not forget Amazon and Ebay too.

Please share your favorite sites in my comments section


Friday, February 27, 2015

Starting Herbs & Heirloom Seeds


In a previous post I wrote about my nifty light set up for starting seeds in my basement. Now that I have the greenhouse, things have gotten a lot easier.

I decided to use the section of my greenhouse that I set up for Intermittent Mist propagation to start my herbs and heirloom plants for this spring. The beds have heat cables installed under the sand mix that will be used for rooting cuttings later this year. I knew that bottom heat speeds up seed germination. I planted my seeds in flats as I always do but this time I placed the flats on top of my heated soil. I turned my mist timer to come on at noon and go off at 3PM. We are having fairly warm weather right now but our nights are still cool. Every night around dark I go out and put the plastic domes on the trays. This keeps in more heat in case the temps outside get below freezing.  The mist will assure that my trays stay moist with no effort from me.

I planted several types of Basil seeds (all saved from plants I had last year) and heirloom tomatoes and peppers. I also tried Tarragon seeds this year. I was amazed at how fast the Basil popped up! I had Genovese and Lemon Basil up in 6 days, Tia in 8 days. The yellow heirloom tomato and Ponderosa Pinks also were up in 6 days. Everything was peeping out by 9 days. The soil in the trays is staying about 70 degrees. As soon as I have true leaves, I'll pick out the plants and pot up into 3 inch pots and grow them off on the other side of greenhouse to make room for cuttings under the mist.


I was pleased with the the herbs I wintered over. These were rooted under mist last fall and I wasn't sure they would survive in my cool greenhouse. I was also unsure if the house would stay above freezing. I put a tiny heater inside but turned it on the lowest setting. The coldest in got inside was 33 on the night that temps here got to 4 below 0 outside! The only one that didn't make it was Cuban Oregano. It was a new plant for me and I didn't know it's hardy zone - obviously, it's not winter hardy in my zone 6b - too bad 'cause it was a beautiful plant. I'm going to try to get some started early next year for next spring sales. 

Another little tip that worked well for me: I used sand to cover the  tiny Basil seeds after I scattered them over my flats, This way I knew they were not covered too deep. I just sprinkled it lightly over the flat and misted it in.

Seed, Water, Sprout

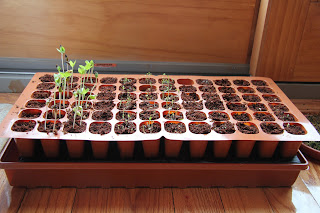
With March temperatures in the upper 40s and low 50s around here, I know spring isn't far away. So, let the seed starting begin! I'm using a 72-cell tray that sits on top of a water soaked mat with a drip tray beneath to keep the cells moist.

I've planted:
Sweet Pea, String Bean, Morning Glory, Moonflower, Wildflower mix, Columbine, Basil, Parsley and an annual Black-Eyed Susan mix


My kids are loving watching the sprouts grow taller every day.
As the sprouts grew, I moved some of the vines into bigger pots:


On the left are the Morning Glory plants. On the right near the window are the Moonflower and String Bean plants. In the foreground on the right I am growing geraniums and impatiens by stem cuttings.

Everything is growing pretty well so far, but I still have a while to go before I can plant them outside. Hopefully by then I'll have many strong and healthy plants to enjoy!


Thursday, February 26, 2015

Winter sowing or recycled seed starters

Seeds in the Snow


I learned about winter seed sowing from some fellow gardeners at the Middle Tennessee Plant Swap last spring. I loved the idea and began saving clear plastic bottles as soon as I got home. Last week I received my order of heirloom seeds from Baker Creek Heirloom Seeds and couldn't wait to get them started.


I got out my saved bottles. Juice bottles, 2 liter cola bottles and milk jugs all work well. Remove the labels but don't worry if you can't get them all off, they will serve as shade when the weather gets warm. Start by cutting around the bottle about 1/3 of the way down from the top. Don't cut all the way around, leave about an inch connected to form a "henge'.


Now fill the bottom with any potting soil mix - you don't need moisture additives or fertilizer. Place your seeds on top and cover with soil according to the depth recommended for the type of seeds you are planting. moisten but don't drench the soil. I made my own labels and laminated them.


Now tape the bottle back together, screw the lid on and place outside and let nature take it's course. My friends who do this every year promise that they have seen their bottles covered with snow and ice but as soon as the weather begins to warm, these little mini greenhouses will warm that potting soil and the little seedlings will pop up. Watch to be sure they don't get too hot. Open the tops on warm bright sunny days - don't forget to replace them if cold nights are expected. The bottles will get much warmer than the outside air so watch and be sure the plants don't burn. When all possibility of frost is past and your seedlings are off to a good atart, fold back the henge, harden off the seedlings for a week or two and plant in the ground or pot up to larger containers.


My husband made a rack for my bottles to keep them from blowing over. It gets pretty windy here on my hill in Tennessee. I can't wait to see how these do. I must admit I saved some seeds in case I kill all these! I'll post the pictures when the first seedlings come up. If this works, I'll never mess with lights and seed starting racks again!

Wednesday, February 25, 2015

Seed Starting Video Tips

It's time to start your tomato and veggie seeds as well as summer flowers. Being a person who sees no point in replicating information or wasting energy (mine!). I want to point you to some really good videos on how to start seeds. These are from Burpee so remember that you can also buy some of the items they talk about from other vendors. Do an Amazon or Google search before you purchase anything. I reuse my little greenhouse boxes over every year. Here are pictures of the ones I just planted. No tomato sprouts yet but coral bells jumped up within a week.